Walkthrough Serious Sam 1 First Blood. Serious Sam: The First Encounter: Detailed description of secrets! Enemies and tactics to combat them
Description and instructions
Level 2. At the exit from the first canyon, we go to the right of the exit and jump onto the platform, coming close to the wall. Behind the wall are two harpies, armor, machine gun cartridges, rockets and something else. (6 out of 6)
Level 6 (Oasis). As soon as you fall into the lake, turn around and jump over the waterfall. In the cave there is a bag and armor. (4 of 6)
On the first level you can find a rocket launcher and ammo for it.
You can find them like this: from the very beginning we go straight up the hill and jump onto the curb on the right, go along it and jump onto the building to the right (it is lower than us), there we find a rocket launcher. Same thing on the other side (rocket).
In the game serios sam at the second stage I found another secret.
You can find it like this: from the very beginning we go through the canyon at the beginning of the game, and then don’t go into the door, but go around this building on the right along the hill and there a door will open in the wall, in it we will find armor and cartridges.
*HATSHEPSUT*
1.Go to the desert. There, on the left, is a small oasis where you will find secret health and ammunition.
Beware! It's full of biomechanoids, and then the harpies will arrive...
2. Having gone up to the first floor, go to the corridor on the left, go to the door there and open it.
3. After going up to the second floor, go right - you will find the second Colt.
4.And here you need to try. After going up to the third floor, go right to the end. Now jump on
railings and from them - onto the post. From there, onto another wall. And then the XPML21 rocket launcher is yours!
5.Now the same thing - on the left - there is ammunition.
6.Now go through the columns on the right side (where you took the rocket launcher) until you reach the very end,
turn left and go all the way. Do you see a piece of the wall that is slightly different in color? Come over
and the door will open.
7.The last seret is behind the door on the first floor on the right. Smash it with a rocket launcher!
*SAND CANYON*
1.In the desert - go to the exit, look to the right, at the mountains - see a tree? You need to try really hard
and get there. So don't rush to kill the bull - he will be able to help you.
2.Again at the exit from the desert - climb the wall with right side, and jump onto the ledge - there is a secret door.
3.In the hall with a torch in the middle - immediately go right, there is a piece of wall, different in color, go to it
and get a Thompson M1-A2 assault rifle
4.After entering the next room, immediately go left behind the column, there a catapult will approach you.
Catch the armor!
5. Rising a little higher, do you see a window in the wall? Enter this hall - and go to the descent on the left side - there, bend down,
and you will find another secret.
6. Once in the desert, try to jump onto the roof of the building when exiting. The best way to do this is with the help of a bull. :)
*TOMB OF RAMESES III*
1. Having risen, you came to a hall with columns. Go to the arch on the right, go up and jump from there
to the next site.
2.3.After passing through the corridors and exiting into the next room - raise your head - at the top, on the beam, you can
see a big heart. To get it, go to the stairs, and on the right side,
jump onto the pavement (the torch will help you) and go to the heart. Go back the same way - and
and you will find a secret passage.
4.5. Having dealt with the arachnoid, you find yourself in the next room. You need to climb the stairs
turn left and climb onto the platform.
Now you can see the rocket launcher. To get it, go to the very edge of the platform.
and turn right. Go there - see the glow? jump!
6.Now go up the stairs. Opposite the door - turn back and walk along the beams
to the platform where there is a bottle of health. follow the beam on the right to the end.
7.8.In the next room. You probably noticed the armor next to the archanoid! How to get it? Go up the stairs
to the exit from the hall. In front of the door, turn around and go to the opposite wall. Now turn around
to the left - and you will see a secret passage.
*VALLEY OF THE KINGS*
1.Break all the statues in the level. If you do this, then in addition to this secret, secret number 3 will open itself.
2.In the hall with the pyramid teleporter. After shooting all the jumpers, go through the door to the platform.
There, facing the pyramid, go to the farthest right corner, behind the columns, at the edge.
Find the catapult.
3.4.Before the bridge - go right all the way. Turn around - do you see a swing pressed to the rock with a stone?
Break the stone and jump on the swing to get to the other side.
*MOUNT MOUNTAINS (secret level)*
1. On the fourth bump - go around it along the very edge
2. From the fifth bump, jump into the waterfall.
3. Behind the waterfall. If you are facing the waterfall, follow the narrow path on the right between the waterfall itself and the stones.
4.You have passed the round waterfall and are going to the exit. You need to jump down. Take your time and go through
along the edge to the wall.
5.After entering the hall with bridges, turn around and shoot at the panel above the entrance.
6. Having fallen into the water, swim strictly to the left and climb onto the rocks.
7.Now go back into the tunnel.
*OASIS*
1.As soon as the level starts, jump back into the waterfall.
2.3.4.In the building - \"eat\" the health pill to the left of the statue, then slowly go to the next pill.
Afterwards, go to the room with ammunition for the grenade launcher. There, pick up the shield armor. Now return to the hall and break
statue.
climb onto the pedestal.
5.6.You are in the hall where there is a red backpack with ammunition. Break the wall on the left side, between the second and third columns.
Go inside, walk around the perimeter, but do not take away the ammunition. Pick them up later.
*DUNES*
1.You are standing on a hill. There is a palace in front of you. Now you have to run through the desert. :)
First look to the left - see the palm tree? go to it and blow it up.
2. Standing by the former palm tree - look back at the hills - there you can see a green bottle with
health.
Go to her.
3. Starting position - in front of the palace on the hill. Go right - look at the hills. There you will see a lot of health (white cube
with a cross)
Pick it up.
4.Now go further in the same direction - and you will see an oasis.
5.Inside the palace. Blow up the right pedestal with columns.
6.Now you need to contrive and jump onto the left pedestal. There, go into the farthest corner.
*SUBURB*
1. Starting point - just outside the gate. Go to the left wall and walk along the houses. At the fourth house
turn left and go into the nook.
2. We go further along the same side along the houses. Do you see a palm tree growing between the eighth and ninth houses?
Break it and go into the opened passage.
3.Second courtyard. Follow the right wall all the way.
4. Starting point - the gate of the second courtyard (entrance). Go along the left side - again behind the fourth house there is a nook with a secret.
5.6. The starting point is the exit gate - standing facing the doors. Go behind the left and right columns.
7.Now jump into the sewer - take your time to move, look around - and you will see a secret passage.
*UNDERGROUND COMMUNICATIONS*
1. At the very beginning. You need to go down to the bottom. The secret corridor is located directly under the ground entrance.
2. We swim to the next hall. If you have enough air, swim through the columns, and after the second row
immediately turn right. You will see armor.
3. Having risen to the exit, jump onto the floors.
4.You left the hall and go down the stairs. As soon as you go down, turn left. There in the corner
in a niche in the floor there is a secret passage.
5.You have passed through a half-flooded basement and are about to exit, when suddenly the panel above the exit moves away
and an Aludran reptilian appears. You need to have time to jump to where he is standing! The panel will then close,
but don't be afraid - there is a lever to open it.
*METROPOLIS*
1.After collecting the skobei, you entered the next courtyard. Without going down, immediately turn right and break the wall near the column.
*ALLEY OF SPHINXES*
1. At the second pillar on the right side - turn left and go deep into the desert - there is a palm tree with ammunition there.
*KARNAK*
1. To get the first secret you will need a good reaction. As soon as the level starts -
quickly, without hesitating for a second, turn back and try to run through the closing doors.
2.First hall. Go immediately right to the wall. Look there and you will see a lever on one of the columns. Same thing with the left
sides.
3.You are in a courtyard with a large swimming pool and a stella in the middle. dive into the pool and swim forward. Do you see the cannonballs for the cannon?
Take them and at the same time open the passage.
4.Now swim to the right branch of the pool - open a darker section of the wall there.
5.You floated out of the tunnel into the next courtyard. Turn around - and go back - there, on the wall behind the columns, find two levers. They
will open
secret passage. You can enter it later - it is open in the previous courtyard,
on the pedestal of the stele. (on the surface)
6. In the hall with two pools, dive into the left one and look for a place on the wall that is a different color.
7.You are in the last courtyard (immediately after the courtyard with the sphinxes). Or go to the left wall, and there, near the ground, look for a small cache.
8. The same cache is on the right side. But you can open it only after you
They will say that "secret health is available."
*LUXOR*
So you're in a courtyard with a huge statue in the middle. To go further, you need to visit the outer courtyards. To
not to get confused, let's call them the right and left courtyard - if you stand at the entrance and look at the statue. Let's go to the right....
1. First right yard. Standing at the entrance to the courtyard, break two columns - the one behind the stele on the right and the one in front of the stele
left.
2. The second courtyard on the right. As soon as you enter, go left, along the wall. There is a catapult in the very corner.
3.Second right yard. Before leaving the courtyard, turn around and jump onto the roof of the house. There, in the middle
The square is different in color from the main background. Stand on him and shoot at him.
4. First left courtyard. As we entered, we will immediately notice the building on the left. There, on the roof, is an ammunition depot. To get there you need
bull's help...
5. Second left courtyard. Having received a heart of gold, we go to the exit. Stop before exiting and move on
against the wall all the way to the end. There, in the alcove, there is a catapult. It will throw you where there is another catapult, which
will throw you onto the roof.
6.On the roof - go a little forward and destroy the wall between the columns.
7.You find yourself in a hall where there is a deep hole right in front of the entrance. Jump there.
8.So, all the amulets are placed and all the enemies are defeated. You are heading towards the exit. Take your time.
As soon as you step over the threshold of the gate, immediately look to your left. There is a small door....
*SACRED GROUND (secret level)*
1.At the beginning of the level. Eat the tablet that hangs to the right of the entrance. Move on. In the next little
Do not touch the tablets in the corridor, but when you go out into the hall with the pool, break the column in the middle of the pool.
2.You are standing at the Sphinx mechanism (the gate is behind you). First let's go to the left courtyard. Once you have opened the door
immediately run forward and shoot at the rising platform.
3. There is another secret in this yard. To do this, you need to press the lever on the far wall on the left.
A bridge will open behind the pedestal, and underneath it will be a lever. Click.
4.Now go to the right courtyard. First, you can take the backpack with ammunition, which is waiting for you to the left of the entrance.
Having fallen into a trap, begin to methodically shoot the enemies. And then you can see how from a pyramid on a jalopy
a couple of "big heads" drive out. Go there, and although they will persistently ask you not to do this -
press the lever in the alcove...
5.6.Go around the pyramid. There in the corners you will find health and ammunition. Secret, of course...
7.So. Now we return to the yard. What do we see? Swimming pool with platforms. Turns the central one
platform to the right. We go along it. There, jumping to the wall - do not press the lever, but with its help
jump to the place where the archanoid was sitting. Having taken health, we return to the starting point.
8.9.Turn the central platform to the left. Do the same manipulations. Now, attention. Approaching
edge of the platform, take the armor, shoot at the square platform on the left, in the water..
10.Now turn the central platform straight. We also jump up using the lever.
and out the window. Let's take the sphinx...
*Great Pyramid*
There are no secrets here. :)
Did the material help you: YES or NO helped: 49, did not help: 5
Published: 02/01/04,
This guide describes how to beat the game easier. Serious Sam HD: The First Encounter. I didn’t particularly look for secrets in the levels, so you won’t find their descriptions here. I played the game on a difficult level (HARD) - if you are not a masochist and do not play on the coolest level (SERIOUS) - this article will help you. In addition, I played the final beta version of the game, which came to me a few weeks before it went gold. As far as I know, all that has been done since then has been bug fixes. Therefore, the location of the monsters and other important details must match. While the Serious Engine is great, the game can be stuttering. I played on a Celeron 566, overclocked to 860, with 192 megabytes of memory, GeForce 2 with medium quality at a resolution of 640x480. There are situations in Serious Sam when hundreds of monsters are chasing you and this slows down the game. You can read about how to avoid slowdown on the Hardware Pub website.
Note: Be sure to learn how to “rocket jump” (RJ) as soon as possible. In many places you cannot do without it. If you've never done this before, turn face down, arm yourself with a bazooka and run towards the wall. Five feet from the wall, aim at the ground, jump and shoot at the same time. Don't be afraid to experiment. This move can be used to jump up to 15-20 feet. Immediately after you start, run back to the secret room. There you will find a bazooka with which you can practice. You should not play the "tourist" and "easy" levels on the training map, as damage is not taken into account there.
Part I: Rune
The game begins at the huge Temple of Hatshetsup. Go to the right passage for the second pistol. This is one of six secrets on this map. Note that on NETRICSA's display the gun is listed as a "single action" but is animated as a two-action gun. Go down one level. As soon as you turn towards the temple, go to the left door - fans come out from there.
They are quite smart and will strike up a conversation with you. I don't remember all the names, but Levelord and OldManMurray are definitely mentioned. They refer to someone like Michael or Booger. Lots of names are mentioned. After all, who wrote the instructions for completing the demo? It was me! I recently re-read Shakespeare's As You Like It Scene Seven, Line 174:
Howl, winter wind, howl!
You're still kinder
Human betrayal
Oh, what am I... Enter the hall where the fanatics are coming out. Take the rockets. Go back to the temple and deal with these zombies. Once you exit the map, you will find yourself in two locked rooms. In the first - a tank and small problems, in the second, last, you will find a gun (Shotgun - SG) and the first serious enemy of the Kleer Skeleton. Move to the next map.
The second map is a sand canyon. Carefully look into the void. Take a chance and get ready for the screaming Kamikazes. Go back and shoot as soon as they appear on the stairs. Once they start exploding, there will be a lot of blood. Beware of Werebull. The best way to get rid of him is to run around him and shoot him with a shotgun. Then carefully look into the second hole and shoot all the monsters with pistols. Go inside. Be on the lookout, that's where they are born. Prepare to enter the temple. After the second kamikaze attack, go back and take the health in the first bowl.
Enter the temple of Thutmose. Continue down the hall. On the left you will see a large room. When you collect all the things, skeletons will attack you. Decide for yourself whether the things are worth fighting with skeletons. There will be another door behind, go there, the passage is barricaded. Beware of headless soldiers - they may suddenly jump out. Then the doors will open. In the room on the left you will find more things (beware of the stones). Then look to the right. As soon as you enter the next room, the door will immediately close behind you. Keep going. You will meet soldiers and skeletons. After you deal with them, you will have to deal with a new monster and a flock of jumping poisonous toads. You need to keep moving and shoot back from these bastards. Soon another skeleton will be added to the problems. After a few of these corridors and fights, you will find yourself outside again, in a valley with steep slopes that you cannot climb. Proceed carefully. Along the way you will meet monsters. Most of them are weak. There will be a goby and a blue Minor Biomechanoid shooting from a laser. Pick up the rune and enter the next temple.
Rub the map - Tomb of Ramses ("My name is OZYMANDIAS, I am the king of kings, look at my creations, envy me!") Continue along old method, beware of ambushes. I checked all the rooms on the sides - many of them are not worth going into. You can find a box of shells and a vial of health. But that won't even cover the costs you'll incur in the battle that will begin as soon as you enter. In addition, many useful things can be found in the rooms on the floors. But I never figured out how to get to them all. BUT since I care about you, dear readers, I set out to find out how to get a bazooka. (rocket launcher - RL) I'll tell you briefly. In the tomb you will meet a new dangerous monster, the Juvenile Scorpion, with an automatic weapon. This is a new breed of those scorpions that we had to deal with in the demos. After you leave the corridor where you met the first scorpion, right above the exit you will find this very bazooka. On the left there will be a platform with a ladder along which you can get a weapon. Go to the platform, head towards the bazooka. In the far right corner you will see shimmering clouds of dust. Enter there, and you are there. Did you take the bazooka? Keep going until you see a door. There will be two comrades standing at the door with large clubs and the appearance of priests. This is your last battle. Facing the priests, back toward the wall, then turn right. A secret door will open, there are a lot of useful things on the shelves. Go back to the door with the priests. From around the corner, shoot all the monsters you can shoot, do not go deeper into the room - the door may close behind you. Once you have dealt with all the monsters, go around the perimeter of the room, dealing with the monsters if possible. You'll have to work before you get to the double-barreled gun. As soon as you take possession of the double-barreled shotgun, there will be a final battle with the monsters. Even though I had a double-barreled shotgun, I only used it against skeletons. Other enemies can only be killed with faster-firing weapons. Continue moving around the perimeter, shoot at headless warriors, skeletons, and toads. Sometimes a scorpion comes along for a change. It will take a lot of luck to get out of this mess alive. All I did was save and reread. As soon as you kill everyone, you can go out and take the rune.
The fourth map is the Valley of the Kings. First you find yourself in a room with ammunition, from it you exit into a large desert valley. Don't go far from this room - before you leave here, you'll have to work harder. You can deal with monsters using long-range pistols. Kill any bulls with a simple gun or double-barreled shotgun. While you cross this plain, you will encounter a lot of monsters. Two new ones will appear towards the end. These are two healthy reptiles that shoot homing fireballs at you. The first one will scare you by appearing out of nowhere. The second, even healthier and more terrible, will appear behind you. This will happen the moment you reach for the bazooka located at the entrance to the temple. You can shoot these balls. You enter the temple. Everything is quiet and calm, you enter the courtyard above a tank with electric fish. In the middle of the courtyard, on a pedestal there will be a key. You won't find anything worthwhile in the water. You shouldn't get into a fight with fish. In the rooms to the left and right are the pedestal control panels. With their help you can get the key. As soon as you enter the room on the left, you will have to defeat the monsters - there are not many of them, and there is a scorpion in the tank. The scorpion will be replaced by another reptile. Then go into the room on the right and use the lever to release the monsters and two scorpions. Take the key, open the door. Walk through the temple carefully, there are plenty of monsters in the temple even for doomophiles. In this temple, you need to get to the room at the top along a ramp covered in ice - familiar to those who have played Half-Life. In the room you will find a manuscript that talks about the “Mountains of the Moon.” At first, I did not pay much attention to this papyrus. As it turned out later, it was in vain. By the end of the game it was revealed that there were two secret cards. One of them is called the Moon Mountains. Towards the end I returned to this map to find a secret area there.
To open these two levels you need to save the cartridge from the rocket launcher...
Your weapon in last battle will become a Thompson assault rifle (Tommy-gun - TG). It's actually not as difficult as some of the other final battles. (Like, for example, in the previous one, with a double-barreled shotgun) First, you will be attacked by toads and kamikazes. Deal with them right away. Switch to the gun. Get rid of the army of skeletons. Get out of there. Look at the bridge. If you walk on it, it will collapse into the water. Afterwards a new official map will begin. But we won't do this. We'd better go to the right, along the ledge. After you've walked a hundred feet, look around. You will see a swinging platform stuck in the cliff. Take out your trusty bazooka and shoot the stone that is causing the platform to get stuck. It's quite difficult, but you need to free her and jump across the gorge to the cave on the other side of the gorge. The first secret map begins there.
Welcome to the Moon Mountains. Please note that I discovered this map after I beat the game. So I played on the "Tourist" level on this map, just to get familiar with it. You find yourself in an area with lush vegetation, the tops of the rocks are connected by bridges. As soon as you cross the bridge, it collapses behind you. The road from the last mountain is not so easy. Jump onto the ledge below and head towards the cave. Wander around until you come across an area with a swirling waterfall. Jump onto the ledge under the waterfall and go to the next cave. A healthier reptile is waiting for you there. At the end, jump into the water and swim out.
The fifth card is Oasis. The road from the water to the temple is not that far, but you have to be very lucky to stay alive. Scorpions (1), reptiles (2), biomechanoids (2), and plenty of other debilitating creatures scurry here and there. Stay in the water, cover yourself with a palm tree from the scorpion, shoot it with a pistol. As soon as the scorpion dies, switch to a shotgun or machine gun, and run to the upper left corner. If you see a reptile, shoot what it throws at you. Be careful, don't pick up anything - as soon as you pick up weapons or ammunition, new monsters appear. Weapons, again, are not worth fighting with the reptiles. Best Tactics survival here is to kill the main monster and hide in the water when new ones appear. Go to the waterfall - most of the monsters will either simply be afraid to follow you into the water, or will run along the bottom - it is not difficult to remove them while afloat. I ran out of shotgun cartridges, so I had to make do with only pistols. By the way, there is a nice secret cave behind the waterfall.
Enter the next temple. Keep your bazooka ready. Don't pick up the Grenade Launcher that's in front of you just yet. A healthy biomechanoid will appear soon, so it’s better to prepare for it. As soon as you kill the biomechanoid, jump onto the pedestal and hide behind the statue. There you will not be reached by the skeletons, who will also appear soon. Shoot at them with pistols, take care of your ammunition. Although maybe this is not so important - soon it will be possible to pick up a lot more cartridges. On the left along the corridor there will be grenades and something else useful. But you shouldn’t take it - more monsters will appear. On the right along the corridor is a small scorpion. If you kill him, new skeletons will appear. Therefore, it is better to stick to the statue.
Along the corridor, after the scorpion, you will find yourself in a large room with armor and ammunition. As soon as you take the ammunition, these terrible toads will attack you. I tried to pass 50 times. In the end, when I passed, I only had two health units left. I just didn't practice my rocket jump in this part of the game. Consider my mistakes. There is a secret room here that I managed to get into a couple of times, but I still don't understand how I did it. But it doesn’t matter, anyway, as soon as you get into this room, toads fall on you. So you shouldn't go there. Even during this massacre, you will have a chance to replenish your supply of machine gun ammunition and gain some health. Take ammo if you want, but be aware that if you take health, a bunch more toads will appear. Therefore, you probably shouldn’t take this health if it’s dear to you :-) When you finish, you will find yourself in a long corridor, which from the very beginning will be filled with unloved creatures. Shoot every single one of them. As soon as you deal with the last biomechanoid, return to the door through which you got here and get ready for a new army of toads. Take the weapon at the end of the corridor, and there you will take the last of the four runes. Congratulations! You've just completed a third of the game.
Part II: Memphis
Sixth map, The Dunes. It starts out scary and continues even worse. You will immediately have to deal with a horde of ten (or so - it was difficult for me to count) biomechanoids. And while you are trying to extinguish them with rockets, new enemies appear in front of you - bulls and monsters. Just run and shoot, that's all I can tell you. After you try to escape from the first fountain, another biomechanoid will appear. I ran away from there headlong. But be careful, there is some sort of force field that can kill you if you go off course and run too far to the left or right. Healthy drawings on the walls are used as boundaries that should not be crossed. If you do cross the line, you have 30 seconds to go back. Otherwise, your health will quickly deteriorate. Don’t pick up the life pill that comes your way, it has a catch. I ran from the fountain to the valley and back, shooting back at the creatures that kept appearing. You will have the opportunity to replenish ammo and health between battles. In the very last battle outside, as many as five reptiles will attack you. The first four will attack you at the four columns at the entrance to the building. Grab the ammo and shoot at any of the ones on the edge with the bazooka. You need to kill her as soon as possible. Then, sticking to the wall where she was killed, shoot the other one. Remove the rest one by one. I shot them with a pistol to save ammunition. But again, as soon as you enter the building, new cartridges will be waiting for you. Therefore, you don’t have to save much. As soon as you kill the last reptile, a Big Daddy will appear - a healthy reptile. Heh, she seems upset about something! So as soon as you deal with all the reptiles, switch back to the bazooka and run up the hill to the fountain. This infection will block the path to the fountain. Try to shoot the fireballs that she releases. As soon as she dies, quickly switch to a gun or a machine gun to shoot the balls still flying at you. There will be a small oasis to your right, where you can gain health that was wasted from the force field and provide yourself with ammunition. If you pick them up, you may not have any particular problems, but generally after that a healthy flock of harpies will appear. In addition, there are weapons further away, behind the wall, but believe me, they are not worth the problems that you will have to solve to get them. Don't go there, girl :-)
As soon as the door to the building has opened, enter and admire your new toy, the laser. (lasergun - LG) Rest a little, don't take other things - otherwise healthy biomechanoids with skeletons will attack you. Look, I didn't suggest you buy this damn game, so don't complain to me that it's not fair. I know it’s not fair. (Editor's Note: You wanted a doom-like game? You got it!) Let's assume the entrance is south. Collect your things and run to the southwestern corner, shoot the first skeletons with a Mauser. If I dealt with the first wave using a laser, then I extinguished the second one with grenades. (Actually, it's quite interesting to fire a series of grenades and watch them bend). Several grenades hit the biomechanoids. After you deal with them, start shooting the small reptiles that appear here and there from the turrets. I found good cover in the shadow of a tower in the southwest corner. I slowly shot the reptiles with pistols and machine guns. They are great at dealing with fireballs. You will have to fight six reptiles, two of which are on the ground. Stay alert. As soon as it's over, the exit is in the next room.
The seventh map is the outskirts of Memphis. (the Suburbs of Memphis) You have your laser. Get ready for the Welcome Wagon. Run to the right corner, you can hide behind it. Along the way you will have to remove all sorts of scorpions and similar evil spirits. After all the troubles you've had, this map will seem like paradise to you. Make your way into the yard carefully and everything will be fine. Don't lose sight of the scorpions in the distant towers. The second courtyard is filled with biomechanoids. Continue firing at the biomechanoid - at the rocket. You will exit from here through the sewer - in the middle of the second courtyard there will be small columns, on each of the columns there will be a lever. With their help, the sewer system opens. There will be two traps in the upper right corner. In the very corner there are rockets and a health pill. Feel free to pick up a weapon, but leave your health. It will be better that way. There will be an armor shard a little to the left. As soon as you take the shield, a singer will appear. While he amuses you with Tyrolean singing, armies of biomechanoids will attack you. If you are fast, and if you are a little lucky, you can have time to take the shield and go into the buildings while this miracle is singing, there - dive into the sewer until you are forced to leave the map. Don't forget to switch to automatic or laser.
Eighth map, sewers (Sewers). It starts with you falling into the water, where you are attacked by electric fish. I strongly recommend dealing with them rather than trying to immediately swim to shore from them. There is practically no chance of survival in this case. Once you get out, go through the rooms and bridges over the water, be careful. After you clear the place, dive into the water; on one of the columns under the water you will find a lever that opens the exit. There, under the water, you will find a couple of secrets after killing the fish, plus armor. In the niche you will find ammunition and one hundred health units. In the next room there is a large staircase. Don't walk down it, and don't pick up anything here, but jump straight into the water. If you go down it, toads will attack you. Of the weapons, the most useful is the machine gun. At the top, to the left of where you came from, is an underwater secret tunnel that will lead you to the room. Health and the necessary ammunition will be waiting for you there. It will be quite difficult to get out of the room - physical forces are at work. In the next room there are several monsters and a lot of ammunition and health. The entrance to the sewer is guarded by two reptiles, but they are not difficult to deal with. You will be warned that you have quite a long swim ahead of you. Take out the laser. You will need it to deal with the fish. In addition, it may be useful to you on the next map. You can get lost in the water, especially after fighting with fish. But along the way you can replenish ammunition and restore health. At the end of the tunnel there will be ammunition again, don't forget to switch to the laser before exiting.
Eventually, the ninth map takes you to Memphis. And you fight monsters again. If you were prudent, followed my advice and prepared the laser, there should not be any problems. But now is not the time to look around - enemies are crawling from everywhere. At first you find yourself in what looks like a dried-out swimming pool. This will be your cover - much like the water on the Oasis map. Walk along the ledge and shoot at the emerging monsters. Don't forget to look around - there may be reptiles behind you, they should be extinguished from a distance. On top of the ledge there will be two boxes of machine gun cartridges. Remember what your wise friend (that is, me) told you - gizmos can cost you your life! This also applies to these cartridges. Walk along the pool, hide in the water from new waves of enemies.
In the next courtyard, right in the middle there will be something like a balcony, where you will need to climb to open the door. As soon as you get onto this balcony, all hell will break loose, so leave all the monsters there and get out of there. Then, when you get to another part of the city, you will have to collect four scarabs to open the next door. And scarabs are scattered around the courtyards. When you get to the door, know that even if you collect these scarabs, the door will open for about ten seconds. Meanwhile, monsters may destroy you, so it’s better to keep moving. Then you will find yourself on the street of a big city. Walk a little down the street - you will come across a small biomechanoid - a sign that skeletons will appear soon. Shoot rockets at the skeletons while you have them, when they run out, run away from there. Run back to the entrance. As soon as you are at the entrance, there will be a narrow street on the right, hide there, prepare a laser to stop the first wave. Skeletons will walk here and there, throw grenades wherever you can so that they ricochet at these skeletons. Be prepared to quickly switch back to your laser to counter their attack when they attack your cover. It took me many tries to get out of here. Therefore I wish you good luck. After you deal with all the skeletons, you will have plenty of health and ammunition.
Continue along the street - you will reach a trap that will close after the bull. Run quickly to the opposite side while she is holding the bull. Pick up all sorts of useful things, such as a machine gun (Chaingun o "Love - CG). Now much more dangerous bulls will attack you. I danced right in front of the trap, many bulls were caught. One bull managed to throw me over the trap to the other side. I stood and spat from above at these bulls. There was no point in chasing me - now sit in the trap. Then the trap closed again and the last two bulls approached me - I had to rein them in. The traps were closed and I went back. Along the way I came across very large and dangerous skeletons . Return to the corner, next to the place where you picked up the armor and ammunition. The skeletons will approach the bend in a dense group. There will be many of them, but they will stay together, thinking best way get to you. Only their thoughts will save you. Fire at them as soon as they approach with whatever you can - rockets, grenades, bullets. If you are lucky, you can pass the first group. There will be a few lagging behind - you can deal with them with a double-barreled shotgun.
Go further along the street - you will find yourself in a large courtyard. Pick up everything you can pick up - fight off kamikaze attacks. Run to the corner and methodically deal with them with a machine gun, it's not difficult. Then there will be a wave of harpies. They will attack en masse when they catch up with you, so run and shoot back from them. As soon as they group into a dense flock, launch a rocket at them. Blood and feathers will bring you satisfaction. Then there will be several bull attacks. To beat them you will have to spend a little time. I eventually figured out that I needed to use the rockets to take down the last five bulls, the ones on the left. And during shooting, move to the left, so that the bulls remain in the group. They get in each other's way in a group, so I had the opportunity to jump back and fire missiles at them until the last of them got too close. They can be killed with a machine gun. The last wave starts with two large biomechanoids and several rows of skeletons. Then two more biomechanoids will appear. Quite a touching decision. You can leave the biomechanoids to shoot at the skeletons chasing you, but if there is only one skeleton left when a new pair of biomechanoids appears, you are in big trouble. In the end, I decided to deal with the biomechanoids and fired grenades at the approaching hordes of skeletons. As soon as they got very close, he shot them with a machine gun. My luck hasn't changed for me. When you finish with the last enemy, the door will open and you will find yourself in a new place - Thebes. Now you've already completed two thirds of the game, but don't worry, you'll still have to deal with monsters on the next map.
Part III: Thebes (Thebes)
The next map, the tenth, is the Alley of Sphinxes. You're probably running low on health after the last battle. Moreover, you have no ammunition - you threw everything away to make it easier to walk through the hot desert. Take care about the ammo for your gun, don’t pick up anything unnecessary - neither health, nor armor - in most cases this ends in attacks from various creatures. BUT halfway down the alley you will come across a flask with health and armor. They are worth picking up, despite the consequences - several biomechanoids. If you do not take health and do not fight with the mechanoids, then THE CANNON and the very necessary missiles will not appear. On the left along the way there will be an oasis with rockets. You will need them in fights with bulls, so take them even if you have to fight biomechaonids. I went through this stage for a very long time - I had little ammunition and health - I had to shoot back from the attacks of monsters with pistols, which is not effective.
After a pleasant walk you will find yourself in a courtyard. If you don't have a cannon, go back and grab the things in the alley. As soon as you take everything, you will be attacked by a lot of all sorts of evil spirits - kamikazes, skeletons, bulls... But it won’t be difficult for you to get rid of them. But since I only had shotgun ammo and a few rockets, I had to replay several times. In the end, I decided that it was time to learn how to rocket jump, and I spent a good half hour learning how to jump. After that, I launched an attack and jumped onto the wall near the entrance. It's a good idea to climb a few feet higher. As soon as I got to the very top of the head, I shot all the monsters for fun. It's a pity that I didn't learn this technique in that terrible room with the toad on the Oasis map...
After you have dealt with all the bulls, you will find yourself in the second yard. Luckily, you'll have a good chance to replenish your health and ammo. When each rune is placed, waves of monsters will appear. I tried to heroically get through this courtyard without resorting to a rocket jump onto the wall, but it seems that I can’t do without it. So, place the first rune in the near left corner, and jump onto the wall separating the first courtyard from the second. Run back along the wall, away from the dangerous place. Shoot monsters - it's not difficult. Place the second rune in the near right corner, jump out of here quickly. Place the third rune in the far right corner and rocket jump again, this time to the back wall. There you will only have to deal with skeletons and kamikazes. I placed the last rune in the far left corner. This time there was no need to resort to a rocket jump. I dealt with all the monsters on earth using a bazooka and a laser. After you kill the last biomechanoids, four reptiles will appear. Shoot them and the balls they launch from the laser. Know that in the middle of the road you will find a lot of ammo and health. I knew that it was time for the most terrible monster, the Lava Golem, to appear. I got ready to run along the trail and collect all my things, and then make a rocket jump out of harm's way. To my amazement, this hefty monster first flew into the first yard, thereby giving me a good opportunity to shoot him. I don't know why he did it. But I know for sure that he did just that, thereby making my life easier. The big monster spawns smaller ones, but you don't have to shoot them to get to the next map. Concerned about this strange behavior of the monster, I completed this map on the SERIOUS difficulty level. This time, the monster stayed put and I had to rocket jump to the right to hide behind the tower. I continued to shoot with the bazooka and the cannon until I killed him. But he left numerous offspring. Moreover, both children and even grandchildren were running near the wall from which I was shooting. I jumped into the first yard and ran in the other direction. Then he jumped back into the main courtyard and ran like crazy towards the exit. These monsters are good at shooting rockets, so you had to run away from them in zigzags so that they don't hit you.
The first part of Thebes is Karnak. This is the eleventh card. The topology of this level is familiar to those who played the demo. In the first room you can also find a secret elevator. Use the levers on the pillars on the right to get the toxic substances. Go to left side, but don't use another lever yet. Walk past the columns, prepare a bazooka, scorpions will appear soon. Shoot them quickly with a bazooka, switch to a machine gun or a laser - shoot all sorts of toads with this weapon. Then start the elevator and go higher. At the top you will find health and cannonballs. You can shoot all the evil spirits from a cannon. After you have dealt with everyone, go back down. When a soldier appears in front of the exit, press the buttons in the elevator, do not kill the soldier yet. Go back upstairs and take down the soldier from there. As soon as you kill a soldier, bulls and skeletons will immediately crawl out of the door. Well, are you happy that you went upstairs? As soon as you try to leave the room, a scorpion will appear in the back of the room. The hall and next courtyard won't be anything special, (just note the trap in front of the temple) but the large courtyard on the right will again give you a lot of fun. As you enter this courtyard, everything around seems to be calm. But then the attack of biomechanoids begins. Move back into the first courtyard and shoot them from the doors. Now return to the large courtyard again, press the buttons in the small pavilions on the left and right. As soon as you get close to the temple, a monster will appear. Fire two cannon shells at him. Then deal with his offspring. Enter the temple, use the lever at the back. There will be a few monsters in the temple - nothing special. As soon as you leave the temple, problems will begin again. So follow my instructions carefully. As soon as you leave, a monster will be waiting for you. Get rid of it. In the tower, in the distance, there will be a reptile. It also needs to be removed. Repeat these same steps on the ground. I tried to leave the yard after that, but thereby caused a healthy wave of monsters and could not cope with it. In the end, it turned out that if you run to the pavilion, which was initially on the left, and only then jump to the side, there will be no monsters. And this is very cool. A technique that worked great in the demo, but which for some reason failed in the beta version - just run to the left side of the left sphinx towards the exit. The monsters will try to catch up with you, but will get stuck between the sphinx and the wall.
Return to the first courtyard, now enter the temple, notice the trap is deactivated. Now there are many useful things available in the rooms on the left and right. Use the buttons to open the door and say hello to the scorpion. Definitely, everything in this room is simpler than in the demo. As a matter of fact, the same as in the next one. It's not worth taking risks here for a hundred health units. It is a trap. Open the door to the courtyard, shoot everyone you can, collect things at the door and run along the back wall to the left door. You'll be making a huge mistake if you pick up the shells in the far right corner. And so - this yard is not complicated. Approach the pool on the left, switch to the cannon, get ready for monsters. Shoot the middle and right monsters, run into the water, continue swimming and dodging. Notice things in the water. At the other end of the pool there will be a tunnel leading to the temple. Get ready for familiar fish. Quietly enter the next room. There is no one there, and you can pick up all sorts of things. Use the levers behind each column. Each lever opens a door at the base of the obelisk, the one in the center of the pool. Dive back into the tunnel, return to the obelisk, swim to the secret gravity room, pick up 100 health and armor there. Go back, kill the monsters that appear on the left, swim back into the tunnel, take the armor if you need it. Enter the room with the key, a scorpion with its subjects will attack you. They are not difficult to defeat. Go to the next room. Collect your things in the corners, go to the mirror, prepare your machine gun for a fight with the reptile that will soon attack you. As soon as you swim back, shoot her right out of the water, then spin around and take the pillows that are flying behind you. At the end of the pool, jump out, switch to the machine gun, and run as quickly as possible. Don't stop for God's sake, if you stop you will cause serious attacks from monsters. Go back to the courtyard. Stick to the wall on the left. Jump onto the platform and dive inside the temple. Be prepared to fight with the laggards. As you enter the temple, there will be several monsters, but in general the temple is free from evil spirits, but full of all sorts of useful things. Go to the hall at the back of the temple, open the door to a small courtyard, take a few steps along it, go back. In the pool on the left, a secret door will open leading to the gravity room. You can find a lot of armored shields there, you shouldn't take them, but the room is interesting to look at. Be careful with the two monsters hiding here.
Go back to the small courtyard. Toads are waiting for you here, but since you have learned how to rocket jump, it will not be difficult for you to defeat them. The only place where it is not difficult to jump is the ledge above the entrance. Walk to the middle of the yard until the toads start jumping over the wall. Then run back and jump onto this ledge. It can be used to deal with all these creatures. In fact, this map is much simpler than in the demo. As soon as you deal with all the toads, go to the exit. There are two more waves waiting for you there, so don't jump prematurely. At first you will not be able to get out, then two bulls will attack you. Then activate the door, kill the second bull with it. Take your time to the next courtyard - biomechanoids are waiting for you there.
After you send the biomechanoids to another world, enter the arena of death. This is the most terrible courtyard I have ever seen, and I don’t know how you can get through it unless you follow my instructions. I wanted to go through it the old fashioned way, but I overloaded about 20 times. In the end, I decided to resort to a rocket jump to jump out of there. Pick up things, fight off attacking monsters and kamikazes, run to the wall on the left and if you love life, make a rocket jump. Even after you get away from there, they will continue to throw lava at you, so you shouldn’t run in a straight line - dodge. Shoot the monsters with a bazooka, but from afar. Little monsters and kamikazes crowd together at the base of the wall. If you shoot at a kamikaze, they will explode and take the monsters with them. Skeletons, bulls, harpies, biomechanoids will attack you again... Stay vigilant - the harpies will pursue you all the time. Also, beware of two bulls and a biomechanoid that will appear above you. Stay at the corner of the temple you will soon enter. Monsters will gather below. It's quite fun to throw grenades at the wall so that they fall down onto the monsters and explode there. Four scorpions will appear in the high towers, you may not notice them, so be careful. Without a doubt, this is the creepiest place yet. Once you have dealt with the last monster, enter the temple.
Enter the temple, be careful. The door in front of you is locked, go into the opening to your left - there will be a key there. Don't pick up any pills - it's a trap. The rest of the things can be taken. Open the door, prepare grenades, as soon as monsters appear to your right, use grenades. Quickly switch to the laser - use it to extinguish the next batch of monsters that appear on the left. The well in front of you seems like an ambush, but in fact this place is worth a visit. To get out of there, go to the painted wall, this is the exit. You can also use this room like this: jump into the pit, and when you return from the secret room, the monsters will line up at the door, maybe it will be easier to deal with them. As soon as you leave there, they will show you an interesting movie about how the obelisk sends signals and a spaceship arrives. Go through this room along the left wall, don't worry about the things - there will be a lot of them on your way, and you don't really want to fool around with the biomechanoids, do you? Climb into the room on the other side, collect everything you see here. If you are in doubt, I hasten to convince you that you will need all this in the next yard. In the same room you will find another manuscript, which tells about the second secret map, The Sacred Yards.
Exit into a large courtyard with many towers. You have to collect four golden ankhs and place them at the base of the central tower. As a rule, as soon as you place a sign in the right place, all sorts of evil spirits attack you. The most terrible attack is the first. Biomechanoids, a bunch of bulls, kamikazes, in short, a lot of work... Run quickly to the ledge and jump out from there with a rocket jump. Scorpions with skeletons will attack next, the ledge will not help you this time, I just dived around the corner, picked up health there and took out all this creature from around the corner with cannonballs, grenades, everything that was at hand. Next in line are the reptiles, again, there is nowhere to hide, so run around the corner and shoot them one by one from there. The last attack is biomechanoids. Rocket jump onto the ledge and shoot them to your heart's content. As soon as you leave the courtyard, you will find yourself in the temple. Take your time to go deeper, there will be a door on the left that is easy to miss. This is the entrance to the Sacred Courts.
The guys from Croteam decided to have some fun with this map, so in honor of this I switched to the maximum difficulty level (SERIOUS). The first yard is very difficult. You will be attacked by terrible monsters, and there is no fun here yet. So I just jumped out of there onto the right wall. Go to the next courtyard, in its center there will be a large pool. If you take a pill at the entrance, a funny little reptile will appear. Don't touch her and she won't touch you. Try at all costs to get her to talk. Pack your things and jump into the pool, get out of here. Get your machine gun ready, you will soon meet fish. If there is no machine gun, go deeper into the tunnel, and as soon as you see fish, launch grenades at them until they all die. Beware of stragglers, they may appear behind you. The exit from the next courtyard will be barred. Use the levers on the sphinxes to get out of there. First use the levers closest to you, then turn around and run into the small room to your left to deal with each of the monsters. Then turn the lever in the far left corner, go back, then the lever in the far right corner. As soon as you exit, biomechanoids will appear, but if you hurry, the door will close right behind you. There will be a puzzle in the center of the next courtyard. She may be able to tell you something. Go to the left courtyard, it's actually fun here, all sorts of gravitational things, little monsters. They are affected by the same forces that are on you, so it is quite interesting to see how they attack you somersaulting. The easiest way is to do a rocket jump and get to the sphinx on the platform, but in general, this level is very interesting, so you can just have fun. I don't recommend using rocket jump here. It's better to use all three levers on the sides of the gravity room to make your way to the golden sphinx. Just below the sphinx there is another secret lever that allows you to pick up health and armor on the wall. Take the sphinx, bring it to the puzzle, try to use it, beware of the creatures that greet you at the entrance. Go to the right courtyard, at the entrance pay attention to the lever on the floor. You must return to this lever each time to rotate the central platform over the pool. Under the platform you will find some health. Use the levers on the sides of the pool to fill it with water, swim to the platform at the opposite end of the pool, and take the sphinx hidden in the opening in the wall there. Beware of the scorpions attacking from the back wall, fight them directly from the water, it's quite difficult and will distract you from main goal. When you get to the sphinx, reptiles will appear, calmly shoot them one after another. As you leave this yard, notice the ammunition to your right. If you take them, you will immediately find yourself in another secret place, where there will be a brutal showdown with flying biomechanoids, scorpions and bulls. Scorpios will not attack you right away - they need time to detect you, so you should move away and deal with everyone from a distance. Shoot the bulls that appear from behind the pyramids with a cannon or something similar. When it's all over, two big-headed fanatics on a funny jalopy will ask you not to enter the pyramid. In any case, get there, turn the lever, and the pyramid will instantly turn into a monument to you. I tried to rocket jump to the top of the pyramid. Perhaps in the beta version there was actually no way out of this place, no matter how hard I tried, I couldn’t get out, I had to use a rocket jump.
The last thirteenth card is The Pyramid. You find yourself in a large room, then go to a small courtyard, where you collect things. Pay attention to the right wall of this courtyard; it will become your shelter for a short time. Go to the next courtyard. You'll have to work here too. Walk to the middle of the courtyard, as soon as the skeletons attack you, run back to the entrance and jump onto the wall using the already familiar technique. I jumped on the one on the left. This is exactly the wall to which I recently drew your attention. You will be safer here. Deal with the skeletons - it's not difficult from your position. Then there will be a wave of bulls. They are able to reach you by climbing on top of each other. So be careful. Then a horde of biomechanoids will appear - you will have to run back to the wall to dodge their missiles, especially when they are in the very depths of the courtyard. As soon as you deal with the biomechanoids, you will have to fight the skeletons again. I have no idea how one can survive here. Jump into the neighboring yard and collect things there.
Go to the big valley, enjoy a movie with a big Bad Actor who doesn't love you. Immediately after the video, be careful, bulls and biomechanoids will attack. Your aim - big temple, built out of rock at the other end of the valley. Shoot everything you see with a cannon. This is an excellent weapon against bulls. Don't worry too much about ammo, you'll find plenty of ammo, shells, health, and armor along the way. Choose it, all this will be useful to you. Go up the path, shoot from the cannon, switch to the laser if necessary. As you approach the temple, notice the large sphinx statues on the ledges on both sides. Make your way to the ledge, beware of skeleton attacks, pick up health and jump behind the statue. Try not to leave too many little monsters alive when you hide. The big ones won't get to you, but skeletons and kamikazes can. Most will gather at the ledge, and they can be easily shot. And some may try to attack you. The statue is the place where you have to duck, fellow Bad Actor destroys everything, no matter what you hide behind. Don't try to shoot him in this place. I don't think you will harm him in any way. Notice that there is a spaceship moving above you. At a certain moment you will hear the sound of a bell. This means that the door is open and you can make your way to the exit. Don't skimp on health and ammo. The only goal is to get out of here.
Now you are ready for the final battle. You are inside a pyramid, there are ledges at the corners that seem to place you in inert energy fields. Why is this being done - ask the developers from Croatia. At the base of each ledge you'll find health, armor, and ammo, which obviously replenishes constantly. The Bad Actor is back, and to finish the game you have to kill him. Run from ledge to ledge, from corner to corner, shoot at the monster with everything you have. I recommend the gun and laser. The gun is very destructive, and with the help of a laser you can shoot various projectiles flying at you. Keep shooting at him all the time. Don't hesitate, keep wandering. As soon as you visit all four fields, a death ray will appear at your disposal, with its help everything will be much simpler. A couple of times it will seem to you that the monster is dead, but then it will come to life again - don’t despair. Just keep shooting and dodging his projectiles. One day he will surely die, then it will be possible to board the ship. Make sure your seat belt is fastened, you will be traveling for a long time.
I apologize for spelling errors in the text (if any)
You can also download the walkthrough as a file.
In the year 2063 from the Nativity of Christ in Egypt, during archaeological excavations, a crypt was discovered - this turned out to be a message from the ancient civilization of Sirius to earthlings.
In addition to the history of the Sirian civilization from its formation, development and death, earthlings learned about their last warning - in the universe there is a powerful and very aggressive civilization of immortal beings who have set their goal to destroy all life in the universe. They almost achieved this, leveling millions of worlds to the void of space and almost destroying the Sirians.
Having been defeated in the war, the Sirians sent a spaceship to Earth (until then unknown to the immortal aggressors) in order to preserve knowledge and convey their last warning. The spaceship crashed into ancient Egypt, which gave impetus to the transformation of apes into humans.
The discovery allowed our descendants to build a ton of their own starships. As a thank you and a gesture of goodwill, the first one was sent to Sirius. Sam Stone became captain and leader.
However - oops. Immortals have been in charge of Sirius for a long time, and, noticing an alien starship, they begin to successively destroy all colonies of earthlings in deep and not so deep space. They reached the Earth in 2113 from the same Nativity of Christ. Take off your hats, bare your heads - a minute of silence for Mother Earth, who is perishing under the yoke of invaders.
But the story takes a sharp turn - a snotty graduate student, rummaging through the junk of the Sirians, finds a time machine. Sam Stone is instantly equipped (a knife in his teeth, a Colt with endless magical ammunition in his belt, a NETRICSA analyzer, which allows him to examine the corpses of enemies, the environment and getting underfoot - in his head) and sent to Ancient Egypt, where the immortals are already hanging out, having not yet had time to unleash their full power.
The goal is to save the Earth. The remedy is to destroy all the immortals (who turn out to be quite mortal - their deaths sit on the edges of Serious Sam's bullets). The end justifies the means, and the means justify the end. Amen. We begin.
Weapon
Knife (Military Knife)
An ordinary military knife that has been “haunting” you since the beginning of the game. Very useful thing- It will surprise you, but the first five (or so) maps can be completed exclusively with it. Deals very high damage to small enemies - headless soldiers, skeletons (knocks down in two hits), gnaars (one swing) and even a blue biomechanoid (two hits if you manage to get there). I strongly do not recommend against toads, kamikazes and anything larger (or equal) to a bull. Also keep in mind that if you are surrounded by a crowd of monsters, then when you hit with a knife, damage is done to only one.
Colt (Shofield .45 w/ TMAR)
At the beginning of the game, you appear with one Colt in your hands and an endless supply of ammunition for it. Immediately take the second Colt - this is Croatian shooting “Macedonian style”. Advantages: endless rounds of ammunition, good accuracy for long-range shooting. Very inconvenient in close combat. I recommend it primarily against kamikazes, other headless soldiers, gnaars, skeletons, biomechanoids, scorpions (the last three are best killed from afar).
 |  |
Berdanka, single-barrel shotgun (12 Guage Pump Action Shotgun)
A fairly well-balanced weapon - short reload time and tolerable destructive power. In addition, there is a ton of ammo for it at all levels. Good against kamikazes (at short range), toads, headless ones, skeletons and gnaars. About the rest, if you run with a Berdanka, forget about them.
Double Barrel Coach Gun
A sort of workhorse of the game. If you don't have a double-barreled shotgun, it will be VERY difficult to get past Serious Sam. The only drawbacks are that they can only be used at short distances and take into account a long reload (the latter is very unnerving when a skeleton starts to gnaw at you, and you convulsively jerk the shutter). Use against skeletons, gnaars, bulls, arachnoids (teenager), LARGE crowds of toads, biomechanoids. It’s better not to fight kamikazes (reloading!), headless soldiers of all stripes (not enough ammunition), or harpies.
 |  |
Thompson submachine gun (The Tommygun)
Remember Blood? By appearance similar, although it does not shoot like a fan. Good weapon, but there is always not enough ammunition (the same for the minigun). Shoot at kamikazes, skeletons, harpies, gnaars, biomechanoids, arachnoids. Yes, in general, for everyone you consider worthy of this weapon.
The Minigun
One of the most conceptual weapons in the game - it’s not for nothing that it’s featured on the cover of Serious Sam. Amazing shooting spectacle, destructive power. Disadvantages - it consumes a lot of ammo and takes a very long time to spin up before firing. Therefore, I do not recommend it against small single enemies (headless, etc.), as well as against fast-moving creatures.
 |  |
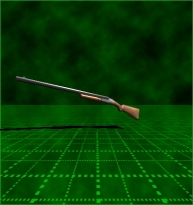
The Rocket Launcher
Rocket launcher, he is also a rocket launcher in Africa. What else to say? If you have played any 3D action game, then you probably know that there is a rocket launcher. There are no differences here, except for the new design. Apply according to the scheme - take it out, aim, shoot. Trying not to get caught in myself. Crowds of skeletons, bulls, biomechanoids, arachnoids, reptiles and other “big brothers” are eagerly awaiting your missiles. It’s better not to give rockets to the headless (it doesn’t pay for itself), toads and other little things. Also, Serious Sam features a rocket jump. To the delight of the specialists.
The Grenade Launcher
It is also extremely transparent. Raise the muzzle, press the left mouse button - and the grenade hits an enemy or an object along a ballistic trajectory. Explodes. All. The indications for (non)use are the same as for the rocket launcher.
Cannon (The CANNON)
“They are preparing a cannon. For what? ABOUT! They will shoot! There is nothing like this anywhere! The most powerful weapon in the game. An ordinary ship's cannon of oh-go-go caliber, carried in the back pocket of jeans and shoots ordinary cast-iron exploding cannonballs. It shoots in such a way that, when it hits, for example, a blue biomechanoid, the core does not explode, but, simply sweeping it out of the way (with a fatal outcome), continues to fly further through the next one and the one standing behind it. Use for anything larger than an ox. Do not use for the reverse situation.
Enemies and tactics to combat them
Headless rocket launchers and grenade launchers (Beheaded Rocketeer, Beheaded Firecracker, Beheaded Bomber)
 |  |  |
A pot-bellied little thing (height 6 feet or 1m 80cm), armed with magic rockets/grenade launchers. It poses virtually no serious threat, and its entire function is to get in the way and cause general confusion.
Use any type of light weapons against them. Special advice In terms of tactics, no - you have to shoot/cut.
Headless Kamikaze
Along with the skeleton, this is an extremely annoying creature throughout the game. Has a habit of running up close to you and blowing himself up - and partly you - with a bomb he holds in his hand, free from dragging his head. Shoot single individuals with a pistol; if there are a lot of them, then try to crowd them into a heap and kill them with pistols/shotguns/Thompson guns - if one explodes, then the kamikazes surrounding it will also detonate. Chain reaction, so to speak.
 |  |
Skeleton (Kleer Skelton)
Skeleton (size 9 feet or about 3.5 meters). From afar it shoots low-power balls connected in a chain, and if it runs up close, it can bite (which, as a rule, happens). It will haunt you the entire game and ruin a lot of your nerve endings. Tactics against singles - cut with a knife (two swings) when you get close; against small groups - retreat, firing pistols, stretch them one by one and again cut them with a knife one by one. For groups consisting of more than four units, on the contrary, try to drag them into a pile and then hit it with a grenade launcher. If there are no grenades, use a minigun (but not a Thompson!).
Toad (Marsh-Hopper from Rigil)
They always attack in large crowds. They are small, but when they jump up to you, they spray poisonous mucus with a fatal outcome both for themselves and, sometimes, for Serious Sam. Sending them to their forefathers is not too difficult - jump and shoot at a large pile of swarming monsters with a Berdanka or double-barreled shotgun.
 |  |  |
Gnaars (Gnaar Female, Gnaar Male)
Byaks with big mouths that try to run up to you and taste you. Nothing complicated at all. It’s even easier to extinguish than headless warriors - take a knife and cut, cut, cut...
Bull (Sirian Werebull)
One of the most dangerous creatures in the first half of the game. A hefty (more than 3 meters long) creature, a cross between a camel and a bull. Moves very quickly. When it catches you, it throws you high into the air (until you land and collect your own bones, you can enjoy the scenery). However, he is clumsy - you can calmly move to the side just before his horns, shooting a flying mutant in the side with a double-barreled shotgun. If you are fighting with one bull, you can walk in a circle - he will never get you. Therefore, use a double-barreled shotgun against individuals; against a crowd, only heavy weapons can save you.
 |  |
Blue small biomechanoid (Bio-Mechanoid, Minor)
Over 5 meters tall, a large blue chicken with two lasers. Cut single ones with a knife (what is it made of? - iron blue biomechanoids finish in two hits!), shoot with a shotgun or rocket launcher (on average 2 rockets per one). If they go in a group, then, in order of effectiveness, there is a rocket launcher, a laser, a minigun.
Big red biomechanoid (Bio-Mechanoid, Major)
He is 10 meters tall (and, accordingly, more stubborn than his younger “colleague”), shoots from two rocket launchers. You can kill one in a couple of shots from a cannon.
 |  |
Arachnoid, Juvenile aka green scorpion
Not a very serious opponent, despite his size and appearance. Shoots intermittently. When it shoots, move aside; when it stops, come back and shoot yourself. All.
Adult arachnoid (Arachnoid, Adult) aka red scorpion
A little larger and a little more stubborn than a teenager. He is also armed with a machine gun. The battle tactics are the same as in the previous case.
 |  |
Green reptile (Aludran Reptiloid, Common)
He is 5 meters tall, armed with magic missiles (not very fast flying green balls of a sickening appearance) - they can be shot down. Try to take down the lone player before he starts shooting balls, otherwise you will have to shoot them down too, they are homing. The group usually doesn't do too much damage, so don't be afraid to focus on the other enemies first. After you have cleared the crowd running towards you, remove them one by one as best you can. effective means, available to you.
Red Reptile (Aludran Reptiloid, Highlander)
Bigger and more stubborn than the green one. However, the tactics are the same.
 |  |
Scythian Witch-Harpy
A small flying creature armed with magical missiles and claws. It’s not difficult to deal with a single one, but it becomes very unpleasant when there are many of them. In this case, if they dive in a bunch, use a rocket launcher, and if they stick out on the ground, use a Thompson submachine gun.
Fish (Reeban Electro-Fish)
Accordingly, it lives in water and shoots electrical charges at you. I can’t say anything special about tactics - shoot, shoot and shoot.
Boss Ugh-Zan 3 (Ugh-Zan III, The Vicious)
100 meters high (30-story building!), armed with everything his subordinates have. See the walkthrough for battle tactics.
Group battle tactics
A few words must be said about the case when a bunch of monsters of different “breeds” fall on you. You shouldn’t blindly shoot at everyone with the first weapon you come across. It is necessary to cut off the most dangerous ones first, leaving others for later. The approximate layout (of course, you can’t make it absolute) looks like this (the first to go are the freaks, who need to be shot first):
1) kamikazes (or frogs);
2) large red biomechanoid;
3) lava golem;
4) bulls;
5) skeletons;
6) small blue biomechanoid;
7) adult arachnoid;
8) teenage arachnoid;
9) reptiles of all colors;
10) harpies;
11) gnaars;
12) headless soldiers.
Naturally, against each type in a group battle, you should use the most convenient weapon in terms of causing damage.
Part I: Rune
Temple of Hatshetsup
So, you have to save the Earth (once again!?). Therefore, do not hesitate - turn to the right from the place of arrival and, after walking a little, take the second pistol from the temple gallery. You feel more confident now, don’t you? Oddly enough, this second pistol is considered one of the secrets of this level, although, in my opinion, either a lame or a blind person might not notice it. Now go down one level. Turn right again and you will see a door on the right again. If you open it, a bunch of big-headed men in Serious Sam outfits will come out. These are the first fans of the game. You can shoot them - there will be no consequences. Go through the door they came from and take the rocket bundle.
Go back and meet your first enemies - headless rocket launchers and the same grenade launchers. Not difficult yet, right? If you have enough patience (I didn’t ;)), then by going up the steps of the temple and jumping on the roof of the pavilion on the left, you can find a rocket launcher there.
Upon entering the temple premises, you find yourself alternately in two large rooms, the path from which inexorably leads to the next level. In the first there is a swimming pool (if you dive into the water, you will find a first aid kit) and the same problems as on the street; in the second, last one - Berdanka, street fights and your first skeleton. With a knife, my friend, with a knife. Let's move on to the next map.
Sand Canyon
Pick up junk indoors and go outside. Only not far, because it will appear immediately new enemy(very plural) - headless kamikazes, filling the air with wild screams. Don't try to compete with them in running speed, just return to the basement where you came from and calmly shoot them. Once they begin to explode, each of them will take a couple with them to the next world, and if they are lucky, then three comrades. Behind the wave of kamikazes there will be skeletons, rocket launchers and other little things. After shooting them, go through the canyon and go into the temple (on the slopes of the canyon, do not forget to pick up cartridges, first aid kits, armor, etc.).
Enter the temple of Thutmose. As you walk down the hall, you will see a passage on the left that leads to a large room. In addition to first aid kits, etc., there will also be skeletons. If you want to fight for a small sum, then this is the place for you. Otherwise move on. There will be another door, but the passage will be closed. Suddenly, tadpoles will begin to appear out of thin air, remember this. Then the doors will open. In the room on the left (where there are two large statues - by the way, they can be destroyed with a berdank) you will find more ammunition, but beware of the hefty rolling stones. It's not difficult: they just roll in a straight line and are easy to dodge. When you turn the other way (right) and enter the next room, the door will immediately close behind you. Keep going. You will meet soldiers and skeletons. After you calm them down, you will have to deal with a new scourge - a flock of jumping poisonous toads. You need to continue to move non-stop all the time, avoiding meeting them, and shoot, shoot and shoot again. A little later, after the toads, there will be another skeleton. There is a secret in this room with a Thompson machine gun: from the entrance, turn right and walk along the wall - a niche will open. Continuing further, you will find yourself outside, in a valley with steep slopes that you cannot climb. Proceed carefully. Along the way, you will naturally encounter monsters. Most of them are already familiar to you. Among the fresh ones there will be a bull (here it’s easier to kill him if you retreat to the entrance and carefully shoot him from a niche with a shotgun), and a small blue biomechanoid shooting from a laser. Most likely, the bull will turn out to be a much more serious opponent for you than the blue hen. Having solved all the problems, enter the next temple and take the first rune.
SECOND PAGE
Tomb of Ramses
(“My name is OZYMANDIAS, I am the king of kings, look at my creations, envy me!”). Continue following the old method, beware of ambushes. Most of the rooms on the sides are not worth entering unless you want to unjustifiably sacrifice health and ammunition. You may find a crate of shells and a health jar - but these likely won't cover your costs in the battle that will begin as soon as you enter and try to take them. Many useful things can be found in rooms on the floors - you'll have to jump. Here, on the floors, there is also a rocket launcher (if you didn’t manage to take it, don’t worry - you will definitely get it on the next map). The scheme for obtaining it is somewhat non-trivial. First, in the tomb, you will meet a new monster, a teenage arachnoid, from the heart (if he has one) with a machine gun. After you leave the corridor where you met the first scorpion, you can see this very rocket launcher right above the exit. Turn left from the entrance and go up the stairs to the higher ground - see the rocket launcher right in front of you? True, there is a small gap separating him from you - don’t try to jump, it’s been checked. Now look closely - there is a small shimmering spot in the far right corner. Feel free to enter it and take the long-awaited toy. Have taken? Then move on, shooting monsters on the crossings. Eventually you will see a door. Open. You shouldn’t immediately climb into it (the door will close if you go in) - it’s better to shoot those freaks (all sorts of headless people and skeletons) that you can see in their corridor. By the way, if you turn to the right from the entrance to the hall, there is a secret passage in the corner, and behind it is a room with health and ammo. Now save, cross yourself and come in. With God blessing. You will really need it.
Move along the perimeter, stretching out the attacking front of the freaks if possible and shooting them one by one. In the center of the hall you will see a double-barreled shotgun - like many amenities in this game, it has a catch: if you take it, the number of problems will immediately increase by another portion of headless people, skeletons, and toads. Use a double-barreled shotgun against the skeletons. Other enemies can only be killed with revolvers. Don't forget about the knife - it will be very useful. Continue moving around the perimeter, shoot at headless warriors, skeletons, and toads. Towards the end (if you're very lucky) a red arachnoid will appear. As soon as you kill everyone, go out and take the second rune.
The Valley of Kings
First you find yourself in a room with ammunition, from which you exit into a large desert valley. Don't go far from this room - here she is your main ally. You can deal with monsters using revolvers. The tactic against bulls is to walk sideways in a circle and shoot with a shotgun. In general, imagine yourself as a bullfighter. While you cross this plain, you will meet a lot of monsters. Don’t fall for the bait that I did - from afar, a flock of (what else can you call it?) blue biomechanoids look very much like headless rocket launchers. Therefore, I was very surprised when I failed, failed, and once again failed to kill any of them with pistols. Here you will also meet a large biomechanoid - an extremely stubborn creature that shoots missiles. Retreat to the entrance - he will not be able to follow you and will stand on the street, firing from a rocket launcher, and you dodge the rockets and bring him down with a shotgun or machine gun - this, in principle, is quite elementary. Towards the end, a couple of new nasties will appear. These are two healthy reptiles that shoot homing fireballs at you. The first reptile will appear, in the dirty manner of all the local monsters, out of thin air, at the very moment when you solve, as it seems to you, the most difficult problem with bulls. The second, even healthier and more terrible, will appear behind you. This will happen the moment you take the rocket launcher located at the entrance to the temple. The balls they shoot can be shot. Enter the temple - there is a courtyard in front, a pool below. You don’t have to go into the water - nothing interesting. In the middle of the courtyard, on a pedestal, there will be a key. In the rooms to the left and right there are pedestal control panels, with their help you can get the key. As soon as you enter the room on the left, you will have to defeat the monsters, there are not many of them, and they really do not like being stabbed. Carefully look outside - see a scorpion in the tank? OK. Take your pistols and shoot (remembering to dodge his bursts). Scorpio will be replaced by another reptile. Then go into the room on the right and use the lever to release the monsters and two scorpions. Take the key and open the door opposite the entrance. Walk through the temple carefully, it is full of freaks who want to get to know you very closely. In this temple, you need to get to the room at the top along a ramp covered in ice. In the room you will find a piece of paper that talks about the “Mountains of the Moon”.
It is difficult to say anything definite about the battle tactics in these casemates and corridors. Lots of blood, meat and green mucus (from toads). There will be no new enemies, but those that appear - the same toads, skeletons and kamikazes (headless soldiers are just boring) - will bring a lot of indelible memories. Purely due to its quantity.
When you finally emerge, you will see a spacious cave and a suspension bridge ahead. You can either safely walk along it, or make your way along the ledge to the right and collect freebies - the result is the same: the bridge bends under you, and you fall into the stormy stream below, or you fall off the ledge and fall into the stormy stream below. Choose. In any case, go to the next map, which is called... But if you go to the right, along the ledge, after a while you will see a swinging platform stuck in the cliff. Take out your rocket launcher and shoot the rock that is causing the platform to get stuck. It's difficult, but if you free her and jump across the gorge to the cave, the first secret map will begin on the other side of the gorge.
Welcome to the Moon Mountains! You find yourself in an area with lush vegetation, the tops of the rocks are connected by bridges. As soon as you cross the bridge, it collapses behind you. The road from the last mountain is not so easy. Jump onto the ledge below and head towards the cave. Wander around until an area with a waterfall opens up. Jump onto the ledge under the waterfall and go to the next cave. A healthier reptile awaits you there. At the end, jump into the water and swim out again.
Oasis
It's not that far from the water to the temple, but you have to be very lucky to get there and survive. Scorpions, reptiles, biomechanoids and other smaller monsters will fall on you in quantities that will make the previous levels seem like baby talk. You shouldn’t get out of the water right away - it and the palm trees are natural shelters. The monsters will come in waves, so kill the main one and the biggest one, then hide in the water and finish off the smaller husks. Don’t pick up anything unnecessarily - many free things turn out to be traps. Is a dozen rounds worth spending two dozen rounds and perhaps a significant portion of your health in a fight with the freaks? I don't know, decide for yourself. Do you see the waterfall? Go to him - behind him is a secret room with some useful junk.
If you are still alive, then after all the ups and downs you probably made it to the temple. Come in. It’s not worth taking the grenade launcher yet; it’s better to get ready to meet a large red biomechanoid. After meeting him (I hope it was more successful for you than for him), jump onto the pedestal and hide behind the statue. From here you can easily and without harm to your health shoot the skeletons that will soon appear. You don’t have to save much on ammo—the game’s authors made sure you have a lot of it. True, they took even more diligent care of the freaks.
Along the corridor, after all the fun with scorpions, skeletons, mechanoids, etc., you will find yourself in a large room with armor and ammunition. As soon as you take the ammunition, the toads will attack you. It is very difficult to pass, but try to survive. There is a secret room here, but it won't do much for you - as soon as you get into this room, toads will descend on you. Probably shouldn't go there. During the massacre, you will have a chance to replenish your machine gun ammo and gain some health. Take the ammo if you want, but be aware that if you take the health, a bunch more toads will appear. When you finish, you will find yourself in a long corridor filled and constantly replenished with all sorts of biomechanoids and other abominations. After them, if you haven't been killed yet, the toads will attack. Run forward to the exit, the toads will be stopped either by a force field or something else behind you. Take the last rune and you can happily go smoke. A third of the game is completed.
Part II: Memphis
The Dunes
It starts off fun; the continuation will be even worse. First, a wave of a dozen biomechanoids will roll in, and a little later, bulls and smaller freaks will join them in an attempt to get to know you. Since, in general, there is nowhere to hide, just run from them (or behind them, whichever you prefer) and shoot back with a rocket launcher. During breaks (if THIS can be called breaks), caring parents of toys from Croteam will give you the opportunity to heal and improve the situation with ammunition. Then everything will start all over again. You'll immediately have to deal with a horde of ten or so biomechanoids. And while you are trying to extinguish them with rockets, more and more new enemies appear in front of you - bulls and monsters. Just run and shoot - that's all there is to it. After you try to escape from the first fountain, another biomechanoid will appear. Don’t pick up the life pill that comes your way, it has a catch. You'll have to run from the fountain to the valley and back, shooting at the monsters that appear. You will have the opportunity to replenish ammo and health between battles. In the very last (hopefully not for you) battle outside, you will be attacked from the heels of reptiles. The first four will attack you at the four columns at the entrance to the building. Try to take down the first one as quickly as possible, then, making your way along the wall, shoot the others one by one. When you deal with this scourge, a big red locomotive will appear... uh, sorry, a reptilian. He will block the path to the fountain. Try to shoot the fireballs that she releases. As soon as she dies, quickly switch to a double-barreled shotgun or a machine gun to shoot the balls still flying at you. There will be a small oasis to your right, where you can gain health and provide yourself with ammunition. If you pick them up, you may not have any particular problems, but generally after that a healthy flock of harpies will appear. In addition, there are cartridges further away, behind the wall.
As soon as the door to the city has opened, enter and take the laser. Before you take the rest of the freebies, think about whether you need a showdown with a crowd of biomechanoids and skeletons. Collect ammunition and run to the left corner (from the exit), shoot the first skeletons with Mausers. You will deal with the first wave using a laser or grenade launcher, and the second - the same. After you deal with them, start shooting the small green reptiles that appear from the turrets on the walls. Try to find a shelter to better deal with these creatures. Their number will be six, of which two will be on earth. If you are still interested, then go through the gate, after which you will be greeted by friendly residents of the outskirts of Memphis.
The Suburbs of Memphis
After the previous one, this map will seem almost like heaven to you. But to survive, even in paradise you will have to work a little. Take the laser and run to the right corner to take cover. Try to quickly deal with arachnoids and other little things that come your way. Don't forget about the arachnoids on the towers, otherwise they can cause some problems. Don't get carried away and be careful and attentive - then you can go out to the next courtyard, filled with mechanoids. In order to move to the next map, you will have to press four levers: in the middle of the courtyard there are small columns, on each of them there is a lever. With their help, the hatch into the sewer opens. There are two traps in the upper right corner. In the very corner there are rockets and a health pill. Health, unlike ammunition, is better not to take. If you're quick and with a little luck, you might be able to dive into the sewer before you're forced out of the map. Switch to automatic or laser - you'll get acquainted with electric fish...
Sewers
So you're in sewer pipe, and you are surrounded by local fauna - electric fish. It’s better to deal with them right away, rather than try to swim to shore from them. There is practically no chance of survival in this case. Once you get to the shore, go through the rooms and bridges above the slurry, be vigilant and careful. It won't be that difficult to deal with the creatures that will meet you there. After shooting the freaks, dive into the water; on one of the columns underwater you will find a lever that opens the exit. Underwater, if you don't mind the time, you can find a couple of secrets, armor and more electric fry. The niche contains ammunition and one hundred health units. In the next room there is a large staircase. Don't walk down it and don't pick up anything here, but jump straight into the water. If you go down the stairs, toads will attack you. The most useful weapon is the machine gun. At the top, to the left of where you came from, there is an underwater secret tunnel that will lead you to a certain room. Health and the necessary ammunition will be waiting for you there. It will be quite difficult to get out of the room - physical forces are at work. In the next room there are several monsters, a lot of ammunition and health. The entrance to the sewer is guarded by two reptiles, but they are not difficult to deal with. You will be warned that you have quite a long swim ahead of you. Take out the laser. You will need it to deal with the fish. In addition, it may be useful to you on the next map. It’s quite possible to get lost in the water, especially after fighting with fish. But along the way you can replenish ammunition and restore health. At the end of the tunnel there will be ammunition again; Don't forget to switch to laser before leaving.
Memphis
Everything is dull and dull - the same freaks, but much more large quantities. Don’t think about it—there simply won’t be time for that—but try to hole them all with, for example, a laser. At first you find yourself in what looks like a dried-out swimming pool. Don't neglect this cover. Walk along the ledge and shoot at the emerging monsters. Don’t forget to look around - there may (and there will be) reptiles behind you; it is better to neutralize them from a distance. On top of the ledge there will be two boxes of machine gun cartridges. Whether you take it or not is your choice, but know that you were warned! Sit in the pool and don't splash around more than necessary.
Air battles over ancient Egypt. |
In the next courtyard, right in the middle there will be something like a balcony, where you will need to climb to open the door. As soon as you get to this balcony, all hell will break loose, so leave all the monsters there and get out of there. Then, when you get to another part of the city, you will have to collect four boxes to open the next door. The boxes will be scattered around the yards. If you are lucky and you collect them, then you will still have, since the door does not open immediately, a chance to suffocate under a pile of ugly bodies. So it's better not to stop. Then you will find yourself on the street of a big city. Walk a little down the street and you will come across a small biomechanoid - which means skeletons will appear soon. Shoot rockets at the skeletons while you have them, and when you run out, run back to the entrance. As soon as you find yourself at the entrance, hide in the narrow street on the right and quickly prepare the laser to stop the first wave. Skeletons are just everywhere - throw grenades wherever you can, so that they ricochet at these same skeletons. Be prepared to quickly switch back to your laser to counter their attack when they attack your cover. After you deal with all the skeletons, you will have plenty of health and ammunition.
Continue down the street. You will reach a trap that will close after the bull. Run quickly to the opposite side while she is holding the bull. Pick up all sorts of useful things, such as a minigun. Now you will be attacked by much more dangerous and numerous bulls. Since they have few brains and high speed, by dancing in front of the trap, you can dump some of them there. The next number after the bulls will be skeletons. Go back to the corner, near where you picked up the armor and ammo. The skeletons will approach the bend in a dense group. There are many of them, but they will stay together, planning the best way to get to you. Only their thoughts will save you. Fire at them as soon as they approach with whatever you can - rockets, grenades, bullets. If you are lucky, you will be able to survive the first group. There will be a few lagging behind; you can deal with them with a double-barreled shotgun or a knife.
Walking further down the street you will come to a large courtyard. Pick up everything you can pick up and fight off kamikaze attacks. Run to the corner and methodically deal with them with a machine gun, it's not difficult. Then a wave of harpies will come. They will attack en masse when they catch up with you, so run and shoot back. As soon as they are grouped into a dense flock, launch a rocket at them. Blood and feathers will warm your soul. Then there will be several bull attacks. To beat them, you will have to spend a little time and effort. Here you need to use rockets to take down the last five bulls, the ones on the left. And during shooting, move to the left, so that the bulls remain in the group. They interfere with each other in a group, so you will have the opportunity to jump back and fire missiles at them until the last of the monsters get too close. They can be finished off with a machine gun. The last wave starts with two large biomechanoids and several rows of skeletons. Then two more biomechanoids will appear. Quite a touching decision. You can spare the biomechanoids so that they shoot at the skeletons chasing you, but if at least one skeleton remains alive when a new pair of biomechanoids appears, then you are in big trouble. When you finish off the last enemy, the door will open and you will be taken to Thebes. Two thirds of the game is completed.
Part III: Thebes (Thebes)
The Alley of Sphinxes
At the very beginning, a very “pleasant” surprise awaits you - either all your cartridges were taken away, or you threw them away yourself. And you find yourself alone with all the future ugliness, naked as a falcon. There is nothing to do, go and collect cartridges, but do not take unnecessary things - first aid kits, armor. It is better to take cartridges only for a double-barreled shotgun - there is no need to risk it in vain. But halfway along the alley you will come across a flask with health and armor. They are worth picking up, despite the consequences - several biomechanoids. If you don't take health and fight with the mechanoids, then the CANNON and the much-needed missiles won't appear. On the left along the way there will be an oasis with rockets. You will need them in fights with bulls, so take them even if you have to communicate with biomechaonids. This stage takes a very long time to complete - you have little ammunition and health, and you have to shoot back from monster attacks with pistols, which is not at all effective.
After such a pleasant walk you will find yourself in a courtyard. If you don't have a gun, go back and grab the things in the alley. As soon as you take everything, you will be attacked by a lot of all sorts of evil spirits - kamikazes, skeletons, bulls... But it won’t be difficult to get rid of them.
Having dealt with all the bulls, you will find yourself in the second yard. Luckily, you have a good opportunity ahead to replenish your health and ammo. You'll need them. When placing each of the runes, crowds of monsters will appear. It's almost impossible to go through them all and stay alive. Almost. After you kill the last biomechanoids, four reptiles will appear. Shoot them and the balls they launch from the laser. Know that in the middle of the road you will find a lot of ammo and health. Then a lava golem will appear. Keep shooting with the bazooka and the cannon until you kill him. But he will leave numerous offspring.
Karnak
The first part of Thebes is Karnak. In the first room you can find a secret elevator. Use the levers on the pillars on the right to get the toxic substances. Go to the left side, but don't touch the other lever yet. Walk past the columns, prepare a bazooka: scorpion arachnoids will soon appear. Quickly shoot them with a bazooka and switch to a machine gun or a laser - with the help of this weapon you will deal with all sorts of toads. Then start the elevator and go higher. At the top you will find health and cannonballs. You can shoot all the evil spirits from a cannon. After you have dealt with everyone, go back down. When a soldier appears in front of the exit, press the buttons in the elevator, do not kill the soldier yet. Go back upstairs and take out the enemy from there. As soon as you kill a soldier, bulls and skeletons will immediately crawl out of the door. As soon as you try to leave the room, a scorpion will appear in the back of the room. The hall and next courtyard won't be anything special (just note the trap in front of the temple), but the large courtyard to the right will again be a lot of fun. As you enter this courtyard, everything around seems to be calm. But then the attack of biomechanoids begins. Move back into the first courtyard and shoot them from the doors. Now return to the large courtyard again, press the buttons in the small pavilions on the left and right. Once you get close to the temple, a golem monster will appear. Fire two cannon shells at him. Then deal with his offspring. Once you enter the temple, use the lever at the back. There will be a few monsters in the temple - nothing special. As soon as you leave the temple, problems will begin again. So follow my instructions carefully. When you leave, a monster will already be waiting for you. Get rid of it. In the tower, in the distance, there will be a reptile. It also needs to be removed. Repeat these same steps on the ground. If you run to the pavilion, which was initially on the left, and only then jump to the side, there will be no monsters. And this is very cool.
Return to the first courtyard, enter now the temple; Note that the trap is deactivated. Now there are many useful things available in the rooms on the left and right. Use the buttons to open the door and say hello to the scorpion. Enter the next room. It's not worth taking risks here for a hundred health units. It is a trap. Open the door to the courtyard, shoot everyone you can, collect things at the door and run along the back wall to the left door. You'll be making a huge mistake if you pick up the shells in the far right corner. Remember that the door at the opposite end from the entrance is closed. Use the pool. Approach the pool on the left, switch to the cannon, get ready for monsters. Shoot the middle and right reptiles, run into the water, continue to swim and dodge. Pay attention to things in the water. At the other end of the pool there will be a tunnel leading to the temple. Get ready for familiar fish. Quietly enter the next room. There is no one there, and you can pick up a lot of different things. Use the levers behind each column. Each lever opens a door at the base of the obelisk, the one in the center of the pool. Dive back into the tunnel, return to the obelisk, swim to the secret room, pick up 100 health units and armor there. Go back, kill the monsters that appear on the left, swim back into the tunnel, take the armor if you need it. Enter the room with the key and you will be attacked by the scorpion and his followers. They are not difficult to destroy. Go to the next room. Collect your things in the corners, go to the mirror, prepare your machine gun for a fight with the reptile that will soon attack you. As soon as you swim back, shoot her right out of the water, then spin around and take the pillows that are flying behind you. At the end of the pool, jump out, switch to the machine gun and run as quickly as possible. Don't stop: If you stop, you will cause serious attacks from monsters. Go back to the courtyard. Stick to the wall on the left. Jump onto the platform and dive inside the temple. Be prepared to fight with the laggards. As you enter the temple, there will be several monsters, but in general the temple is free from evil spirits, but full of all sorts of useful things. Go to the hall at the back of the temple, open the door to a small courtyard, take a few steps along it, go back. In the pool on the left, a secret door will open leading to a secret room. You can find a lot of armored shields there, but you shouldn't take them. You can also find a couple of monsters there.
Go back to the small courtyard. Toads are waiting for you here. The only place where it's easy to jump is the ledge above the entrance. Once you have dealt with all the toads, go to the exit. There are two more waves waiting for you there, so don't jump headlong. At first you will not be able to get out, then two bulls will attack you. Then activate the door, kill another bull with it. Take your time to the next courtyard - biomechanoids will happily greet you there.
Having sent biomechanoids to another world, enter the arena of death. This is the scariest yard. Shoot the monsters with a bazooka, but from afar. Little monsters and kamikazes crowd together at the base of the wall. If you shoot at a kamikaze, they will explode and take their neighbors with them. You will again be attacked by skeletons, bulls, harpies, biomechanoids... Do not lose your vigilance - the harpies will pursue you all the time. Also, beware of two bulls and a biomechanoid that will appear from above you. Stay at the corner of the temple, which you will soon enter. Monsters will gather below. It's quite fun to throw grenades at the wall so that they fall down onto the monsters and explode there. Four scorpions will appear in the high towers, you may not notice them, so be careful. Without a doubt, this is the creepiest place yet. Once you have dealt with the last monster, enter the temple.
Luxor
These are not harpies - these are the spirits of dead warriors. And now they will unite with them... |
Enter the temple, but be careful. The door in front of you is locked; look into the opening to your left - there will be a key there. Don't pick up any pills - it's a trap. The rest of the things can be taken. Open the door, prepare the grenades and use them as soon as the monsters appear to your right. Quickly switch to the laser - use it to extinguish the next batch of monsters that appear on the left. The well in front of you seems like an ambush; in fact, this place is worth visiting. To get out of there, go to the painted wall - this is the exit. You can also use this room like this: jump into the pit, and when you return from the secret room, the freaks will line up at the door; maybe it will be easier to deal with them this way. As soon as you leave there, they will show you an interesting movie about how the obelisk sends signals and a spaceship arrives. Go through this room along the left wall and don't worry about things unless you want to meet the biomechanoids. In the room on the other side, collect everything you see. If you are in doubt, I hasten to convince you that you will need all this in your next yard. There will also be another manuscript here that talks about the second secret map, the Sacred Courts.
Exit into a large courtyard with many towers. You have to collect four golden signs and place them at the base of the central tower. As a rule, as soon as you place a sign in the right place, all sorts of evil spirits attack you. The most terrible attack is the first. Biomechanoids, a bunch of bulls, kamikazes... in short, a lot of work. Scorpions with skeletons will be next, shoot all these creatures from around the corner with cannonballs, grenades, whatever is at hand. Next in line are reptiles. The last attack is biomechanoids. As soon as you leave the courtyard, you will find yourself in the temple. But if you're not in a hurry to move to the next official map, then push the door on the left, which is easy to miss. This is the entrance to the Sacred Courts. Otherwise, move forward and move on to studying the pyramids.
The Pyramid
You find yourself in a large room, then go to a small courtyard, where you collect things. Pay attention to the right wall of this courtyard: it will become your shelter for a short time. Go to the next courtyard. You'll have to work here too. Walk to the middle of the courtyard - skeletons will attack you. Then there will be a wave of bulls. Be extremely careful. As soon as you deal with the biomechanoids, you will have to fight the skeletons again. To die here, so close to the desired goal, would be simply a shame.
Go to the big valley, enjoy a movie with a Big Boss who doesn't love you. Immediately after the video, be careful: bulls and biomechanoids will attack. If you want to live further, then your goal is a large temple built out of rock at the other end of the valley. Shoot everything you see with a cannon. This is an excellent weapon against bulls. Don't worry too much about ammo, you'll find plenty of ammo, shells, health, and armor along the way. Choose it, all this will be useful to you. Go up the path, shoot from the cannon, switch to the laser if necessary. As you approach the temple, notice the large sphinx statues on the ledges on both sides. Make your way to the ledge, beware of the skeleton attacks, take health and jump behind the statue. Try not to leave too many little monsters alive when you hide. The big ones won't get to you. But skeletons and kamikazes can. Most will crowd around the ledge, and they can be easily shot. And some may try to attack you. The statue is the place where you have to duck: the bad Boss destroys everything, no matter what you hide behind. Don't try to shoot him here - it's unlikely that you'll harm him in any way. Notice that there is a spaceship moving above you. At a certain moment you will hear the sound of a bell. This means that the door is open and you can make your way to the exit. Don't skimp on health and ammo. The only goal is to get out of here.
Now you are ready for the final battle. You are inside a pyramid; in the corners there are ledges with energy fields. At the base of each ledge you'll find health, armor and ammo, which are obviously constantly replenished. The Boss is coming back, and to finish the game you will have to kill him. Run from ledge to ledge, from corner to corner, shoot at the monster with everything you have. I recommend the gun and laser. The gun has enormous destructive power, and with the help of a laser you can shoot various projectiles flying at you. Keep shooting non-stop at the monster. Don't hesitate. Keep wandering. As soon as you visit all four fields, a death ray will appear at your disposal, and with its help everything will be much simpler. A couple of times it will seem to you that the Boss is dead, but then he will come to life again - don’t despair. Just keep shooting and dodging his projectiles. One day he will die completely, and then it will be possible to board the ship. The long road to the house is almost completed, there is little left - just a flight. Congratulations, you have been awarded the Order of Serious Sam.
Serious Sam HD: The First Encounter
This guide describes how to easily complete the game Serious Sam HD: The First Encounter. I didn’t particularly look for secrets in the levels, so you won’t find their descriptions here. I played the game on a difficult level (HARD) - if you are not a masochist and do not play on the coolest level (SERIOUS) - this article will help you. In addition, I played the final beta version of the game, which came to me a few weeks before it went gold. As far as I know, all that has been done since then has been bug fixes. Therefore, the location of the monsters and other important details must match. While the Serious Engine is great, the game can be stuttering. I played on a Celeron 566, overclocked to 860, with 192 megabytes of memory, GeForce 2 with medium quality at a resolution of 640x480. There are situations in Serious Sam when hundreds of monsters are chasing you and this slows down the game. You can read about how to avoid slowdown on the Hardware Pub website.
Note: Be sure to learn how to “rocket jump” (RJ) as soon as possible. In many places you cannot do without it. If you've never done this before, turn face down, arm yourself with a bazooka and run towards the wall. Five feet from the wall, aim at the ground, jump and shoot at the same time. Don't be afraid to experiment. This move can be used to jump up to 15-20 feet. Immediately after you start, run back to the secret room. There you will find a bazooka with which you can practice. You should not play the "tourist" and "easy" levels on the training map, as damage is not taken into account there.
Part I: Rune
The game begins at the huge Temple of Hatshetsup. Go to the right passage for the second pistol. This is one of six secrets on this map. Note that on NETRICSA's display the gun is listed as a "single action" but is animated as a two-action gun. Go down one level. As soon as you turn towards the temple, go to the left door - fans come out from there.
They are quite smart and will strike up a conversation with you. I don't remember all the names, but Levelord and OldManMurray are definitely mentioned. They refer to someone like Michael or Booger. Lots of names are mentioned. After all, who wrote the instructions for completing the demo? It was me! I recently re-read Shakespeare's As You Like It Scene Seven, Line 174:
Howl, winter wind, howl!
You're still kinder
Human betrayal
Oh, what am I... Enter the hall where the fanatics are coming out. Take the rockets. Go back to the temple and deal with these zombies. Once you exit the map, you will find yourself in two locked rooms. In the first - a tank and small problems, in the second, last, you will find a gun (Shotgun - SG) and the first serious enemy of the Kleer Skeleton. Move to the next map.
The second map is a sand canyon. Carefully look into the void. Take a chance and get ready for the screaming Kamikazes. Go back and shoot as soon as they appear on the stairs. Once they start exploding, there will be a lot of blood. Beware of Werebull. The best way to get rid of him is to run around him and shoot him with a shotgun. Then carefully look into the second hole and shoot all the monsters with pistols. Go inside. Be on the lookout, that's where they are born. Prepare to enter the temple. After the second kamikaze attack, go back and take the health in the first bowl.
Enter the temple of Thutmose. Continue down the hall. On the left you will see a large room. When you collect all the things, skeletons will attack you. Decide for yourself whether the things are worth fighting with skeletons. There will be another door behind, go there, the passage is barricaded. Beware of headless soldiers - they may suddenly jump out. Then the doors will open. In the room on the left you will find more things (beware of the stones). Then look to the right. As soon as you enter the next room, the door will immediately close behind you. Keep going. You will meet soldiers and skeletons. After you deal with them, you will have to deal with a new monster and a flock of jumping poisonous toads. You need to keep moving and shoot back from these bastards. Soon another skeleton will be added to the problems. After a few of these corridors and fights, you will find yourself outside again, in a valley with steep slopes that you cannot climb. Proceed carefully. Along the way you will meet monsters. Most of them are weak. There will be a goby and a blue Minor Biomechanoid shooting from a laser. Pick up the rune and enter the next temple.
Rub the map - Tomb of Ramses ("My name is OZYMANDIAS, I am the king of kings, look at my creations, envy me!") Continue following the old method, beware of ambushes. I checked all the rooms on the sides - many of them are not worth going into. You can find a box of shells and a vial of health. But that won't even cover the costs you'll incur in the battle that will begin as soon as you enter. In addition, many useful things can be found in the rooms on the floors. But I never figured out how to get to them all. BUT since I care about you, dear readers, I set out to find out how to get a bazooka. (rocket launcher - RL) I'll tell you briefly. In the tomb you will meet a new dangerous monster, the Juvenile Scorpion, with an automatic weapon. This is a new breed of those scorpions that we had to deal with in the demos. After you leave the corridor where you met the first scorpion, right above the exit you will find this very bazooka. On the left there will be a platform with a ladder along which you can get a weapon. Go to the platform, head towards the bazooka. In the far right corner you will see shimmering clouds of dust. Enter there, and you are there. Did you take the bazooka? Keep going until you see a door. There will be two comrades standing at the door with large clubs and the appearance of priests. This is your last battle. Facing the priests, back toward the wall, then turn right. A secret door will open, there are a lot of useful things on the shelves. Go back to the door with the priests. From around the corner, shoot all the monsters you can shoot, do not go deeper into the room - the door may close behind you. Once you have dealt with all the monsters, go around the perimeter of the room, dealing with the monsters if possible. You'll have to work before you get to the double-barreled gun. As soon as you take possession of the double-barreled shotgun, there will be a final battle with the monsters. Even though I had a double-barreled shotgun, I only used it against skeletons. Other enemies can only be killed with faster-firing weapons. Continue moving around the perimeter, shoot at headless warriors, skeletons, and toads. Sometimes a scorpion comes along for a change. It will take a lot of luck to get out of this mess alive. All I did was save and reread. As soon as you kill everyone, you can go out and take the rune.
The fourth map is the Valley of the Kings. First you find yourself in a room with ammunition, from it you exit into a large desert valley. Don't go far from this room - before you leave here, you'll have to work harder. You can deal with monsters using long-range pistols. Kill any bulls with a simple gun or double-barreled shotgun. While you cross this plain, you will encounter a lot of monsters. Two new ones will appear towards the end. These are two healthy reptiles that shoot homing fireballs at you. The first one will scare you by appearing out of nowhere. The second, even healthier and more terrible, will appear behind you. This will happen the moment you reach for the bazooka located at the entrance to the temple. You can shoot these balls. You enter the temple. Everything is quiet and calm, you enter the courtyard above a tank with electric fish. In the middle of the courtyard, on a pedestal there will be a key. You won't find anything worthwhile in the water. You shouldn't get into a fight with fish. In the rooms to the left and right are the pedestal control panels. With their help you can get the key. As soon as you enter the room on the left, you will have to defeat the monsters - there are not many of them, and there is a scorpion in the tank. The scorpion will be replaced by another reptile. Then go into the room on the right and use the lever to release the monsters and two scorpions. Take the key, open the door. Walk through the temple carefully, there are plenty of monsters in the temple even for doomophiles. In this temple, you need to get to the room at the top along a ramp covered in ice - familiar to those who have played Half-Life. In the room you will find a manuscript that talks about the “Mountains of the Moon.” At first, I did not pay much attention to this papyrus. As it turned out later, it was in vain. By the end of the game it was revealed that there were two secret cards. One of them is called the Moon Mountains. Towards the end I returned to this map to find a secret area there.
To open these two levels you need to save the cartridge from the rocket launcher...
Your weapon in the final battle will be the Thompson submachine gun (Tommy-gun - TG). It's actually not as difficult as some of the other final battles. (Like, for example, in the previous one, with a double-barreled shotgun) First, you will be attacked by toads and kamikazes. Deal with them right away. Switch to the gun. Get rid of the army of skeletons. Get out of there. Look at the bridge. If you walk on it, it will collapse into the water. Afterwards a new official map will begin. But we won't do this. We'd better go to the right, along the ledge. After you've walked a hundred feet, look around. You will see a swinging platform stuck in the cliff. Take out your trusty bazooka and shoot the stone that is causing the platform to get stuck. It's quite difficult, but you need to free her and jump across the gorge to the cave on the other side of the gorge. The first secret map begins there.
Welcome to the Moon Mountains. Please note that I discovered this map after I beat the game. So I played on the "Tourist" level on this map, just to get familiar with it. You find yourself in an area with lush vegetation, the tops of the rocks are connected by bridges. As soon as you cross the bridge, it collapses behind you. The road from the last mountain is not so easy. Jump onto the ledge below and head towards the cave. Wander around until you come across an area with a swirling waterfall. Jump onto the ledge under the waterfall and go to the next cave. A healthier reptile is waiting for you there. At the end, jump into the water and swim out.
The fifth card is Oasis. The road from the water to the temple is not that far, but you have to be very lucky to stay alive. Scorpions (1), reptiles (2), biomechanoids (2), and plenty of other debilitating creatures scurry here and there. Stay in the water, cover yourself with a palm tree from the scorpion, shoot it with a pistol. As soon as the scorpion dies, switch to a shotgun or machine gun, and run to the upper left corner. If you see a reptile, shoot what it throws at you. Be careful, don't pick up anything - as soon as you pick up weapons or ammunition, new monsters appear. Weapons, again, are not worth fighting with the reptiles. The best survival tactic here is to kill the main monster and hide in the water when new ones appear. Go to the waterfall - most of the monsters will either simply be afraid to follow you into the water, or will run along the bottom - it is not difficult to remove them while afloat. I ran out of shotgun cartridges, so I had to make do with only pistols. By the way, there is a nice secret cave behind the waterfall.
Enter the next temple. Keep your bazooka ready. Don't pick up the Grenade Launcher that's in front of you just yet. A healthy biomechanoid will appear soon, so it’s better to prepare for it. As soon as you kill the biomechanoid, jump onto the pedestal and hide behind the statue. There you will not be reached by the skeletons, who will also appear soon. Shoot at them with pistols, take care of your ammunition. Although maybe this is not so important - soon it will be possible to pick up a lot more cartridges. On the left along the corridor there will be grenades and something else useful. But you shouldn’t take it - more monsters will appear. On the right along the corridor is a small scorpion. If you kill him, new skeletons will appear. Therefore, it is better to stick to the statue.
Along the corridor, after the scorpion, you will find yourself in a large room with armor and ammunition. As soon as you take the ammunition, these terrible toads will attack you. I tried to pass 50 times. In the end, when I passed, I only had two health units left. I just didn't practice my rocket jump in this part of the game. Consider my mistakes. There is a secret room here that I managed to get into a couple of times, but I still don't understand how I did it. But it doesn’t matter, anyway, as soon as you get into this room, toads fall on you. So you shouldn't go there. Even during this massacre, you will have a chance to replenish your supply of machine gun ammunition and gain some health. Take ammo if you want, but be aware that if you take health, a bunch more toads will appear. Therefore, you probably shouldn’t take this health if it’s dear to you :-) When you finish, you will find yourself in a long corridor, which from the very beginning will be filled with unloved creatures. Shoot every single one of them. As soon as you deal with the last biomechanoid, return to the door through which you got here and get ready for a new army of toads. Take the weapon at the end of the corridor, and there you will take the last of the four runes. Congratulations! You've just completed a third of the game.
Part II: Memphis
Sixth map, The Dunes. It starts out scary and continues even worse. You will immediately have to deal with a horde of ten (or so - it was difficult for me to count) biomechanoids. And while you are trying to extinguish them with rockets, new enemies appear in front of you - bulls and monsters. Just run and shoot, that's all I can tell you. After you try to escape from the first fountain, another biomechanoid will appear. I ran away from there headlong. But be careful, there is some sort of force field that can kill you if you go off course and run too far to the left or right. Healthy drawings on the walls are used as boundaries that should not be crossed. If you do cross the line, you have 30 seconds to go back. Otherwise, your health will quickly deteriorate. Don’t pick up the life pill that comes your way, it has a catch. I ran from the fountain to the valley and back, shooting back at the creatures that kept appearing. You will have the opportunity to replenish ammo and health between battles. In the very last battle outside, as many as five reptiles will attack you. The first four will attack you at the four columns at the entrance to the building. Grab the ammo and shoot at any of the ones on the edge with the bazooka. You need to kill her as soon as possible. Then, sticking to the wall where she was killed, shoot the other one. Remove the rest one by one. I shot them with a pistol to save ammunition. But again, as soon as you enter the building, new cartridges will be waiting for you. Therefore, you don’t have to save much. As soon as you kill the last reptile, a Big Daddy will appear - a healthy reptile. Heh, she seems upset about something! So as soon as you deal with all the reptiles, switch back to the bazooka and run up the hill to the fountain. This infection will block the path to the fountain. Try to shoot the fireballs that she releases. As soon as she dies, quickly switch to a gun or a machine gun to shoot the balls still flying at you. There will be a small oasis to your right, where you can gain health that was wasted from the force field and provide yourself with ammunition. If you pick them up, you may not have any particular problems, but generally after that a healthy flock of harpies will appear. In addition, there are weapons further away, behind the wall, but believe me, they are not worth the problems that you will have to solve to get them. Don't go there, girl :-)
As soon as the door to the building has opened, enter and admire your new toy, the laser. (lasergun - LG) Rest a little, don't take other things - otherwise healthy biomechanoids with skeletons will attack you. Look, I didn't suggest you buy this damn game, so don't complain to me that it's not fair. I know it’s not fair. (Editor's Note: You wanted a doom-like game? You got it!) Let's assume the entrance is south. Collect your things and run to the southwestern corner, shoot the first skeletons with a Mauser. If I dealt with the first wave using a laser, then I extinguished the second one with grenades. (Actually, it's quite interesting to fire a series of grenades and watch them bend). Several grenades hit the biomechanoids. After you deal with them, start shooting the small reptiles that appear here and there from the turrets. I found good cover in the shadow of a tower in the southwest corner. I slowly shot the reptiles with pistols and machine guns. They are great at dealing with fireballs. You will have to fight six reptiles, two of which are on the ground. Stay alert. As soon as it's over, the exit is in the next room.
The seventh map is the outskirts of Memphis. (the Suburbs of Memphis) You have your laser. Get ready for the Welcome Wagon. Run to the right corner, you can hide behind it. Along the way you will have to remove all sorts of scorpions and similar evil spirits. After all the troubles you've had, this map will seem like paradise to you. Make your way into the yard carefully and everything will be fine. Don't lose sight of the scorpions in the distant towers. The second courtyard is filled with biomechanoids. Continue firing at the biomechanoid - at the rocket. You will exit from here through the sewer - in the middle of the second courtyard there will be small columns, on each of the columns there will be a lever. With their help, the sewer system opens. There will be two traps in the upper right corner. In the very corner there are rockets and a health pill. Feel free to pick up a weapon, but leave your health. It will be better that way. There will be an armor shard a little to the left. As soon as you take the shield, a singer will appear. While he amuses you with Tyrolean singing, armies of biomechanoids will attack you. If you are fast, and if you are a little lucky, you can have time to take the shield and go into the buildings while this miracle is singing, there - dive into the sewer until you are forced to leave the map. Don't forget to switch to automatic or laser.
Eighth map, sewers (Sewers). It starts with you falling into the water, where you are attacked by electric fish. I strongly recommend dealing with them rather than trying to immediately swim to shore from them. There is practically no chance of survival in this case. Once you get out, go through the rooms and bridges over the water, be careful. After you clear the place, dive into the water; on one of the columns under the water you will find a lever that opens the exit. There, under the water, you will find a couple of secrets after killing the fish, plus armor. In the niche you will find ammunition and one hundred health units. In the next room there is a large staircase. Don't walk down it, and don't pick up anything here, but jump straight into the water. If you go down it, toads will attack you. Of the weapons, the most useful is the machine gun. At the top, to the left of where you came from, is an underwater secret tunnel that will lead you to the room. Health and the necessary ammunition will be waiting for you there. It will be quite difficult to get out of the room - physical forces are at work. In the next room there are several monsters and a lot of ammunition and health. The entrance to the sewer is guarded by two reptiles, but they are not difficult to deal with. You will be warned that you have quite a long swim ahead of you. Take out the laser. You will need it to deal with the fish. In addition, it may be useful to you on the next map. You can get lost in the water, especially after fighting with fish. But along the way you can replenish ammunition and restore health. At the end of the tunnel there will be ammunition again, don't forget to switch to the laser before exiting.
Eventually, the ninth map takes you to Memphis. And you fight monsters again. If you were prudent, followed my advice and prepared the laser, there should not be any problems. But now is not the time to look around - enemies are crawling from everywhere. At first you find yourself in what looks like a dried-out swimming pool. This will be your cover - much like the water on the Oasis map. Walk along the ledge and shoot at the emerging monsters. Don't forget to look around - there may be reptiles behind you, they should be extinguished from a distance. On top of the ledge there will be two boxes of machine gun cartridges. Remember what your wise friend (that is, me) told you - gizmos can cost you your life! This also applies to these cartridges. Walk along the pool, hide in the water from new waves of enemies.
In the next courtyard, right in the middle there will be something like a balcony, where you will need to climb to open the door. As soon as you get onto this balcony, all hell will break loose, so leave all the monsters there and get out of there. Then, when you get to another part of the city, you will have to collect four scarabs to open the next door. And scarabs are scattered around the courtyards. When you get to the door, know that even if you collect these scarabs, the door will open for about ten seconds. Meanwhile, monsters may destroy you, so it’s better to keep moving. Then you will find yourself on the street of a big city. Walk a little down the street - you will come across a small biomechanoid - a sign that skeletons will appear soon. Shoot rockets at the skeletons while you have them, when they run out, run away from there. Run back to the entrance. As soon as you are at the entrance, there will be a narrow street on the right, hide there, prepare a laser to stop the first wave. Skeletons will walk here and there, throw grenades wherever you can so that they ricochet at these skeletons. Be prepared to quickly switch back to your laser to counter their attack when they attack your cover. It took me many tries to get out of here. Therefore I wish you good luck. After you deal with all the skeletons, you will have plenty of health and ammunition.
Continue along the street - you will reach a trap that will close after the bull. Run quickly to the opposite side while she is holding the bull. Pick up all sorts of useful things, such as a machine gun (Chaingun o "Love - CG). Now much more dangerous bulls will attack you. I danced right in front of the trap, many bulls were caught. One bull managed to throw me over the trap to the other side. I stood and spat from above at these bulls. There was no point in chasing me - now sit in the trap. Then the trap closed again and the last two bulls approached me - I had to rein them in. The traps were closed and I went back. Along the way I came across very large and dangerous skeletons . Return to the corner, next to the place where you picked up the armor and ammunition. The skeletons will approach the bend in a dense group. There will be many of them, but they will stay together, thinking about the best way to get to you. Only their thoughts will save you. Fire at them, as soon as they approach, use whatever you can - rockets, grenades, bullets. If you are lucky, you can get past the first group. There will be a few lagging behind - you can deal with them with a double-barreled shotgun.
Go further along the street - you will find yourself in a large courtyard. Pick up everything you can pick up - fight off kamikaze attacks. Run to the corner and methodically deal with them with a machine gun, it's not difficult. Then there will be a wave of harpies. They will attack en masse when they catch up with you, so run and shoot back from them. As soon as they group into a dense flock, launch a rocket at them. Blood and feathers will bring you satisfaction. Then there will be several bull attacks. To beat them you will have to spend a little time. I eventually figured out that I needed to use the rockets to take down the last five bulls, the ones on the left. And during shooting, move to the left, so that the bulls remain in the group. They get in each other's way in a group, so I had the opportunity to jump back and fire missiles at them until the last of them got too close. They can be killed with a machine gun. The last wave starts with two large biomechanoids and several rows of skeletons. Then two more biomechanoids will appear. Quite a touching decision. You can leave the biomechanoids to shoot at the skeletons chasing you, but if there is only one skeleton left when a new pair of biomechanoids appears, you are in big trouble. In the end, I decided to deal with the biomechanoids and fired grenades at the approaching hordes of skeletons. As soon as they got very close, he shot them with a machine gun. My luck hasn't changed for me. When you finish with the last enemy, the door will open and you will find yourself in a new place - Thebes. Now you've already completed two thirds of the game, but don't worry, you'll still have to deal with monsters on the next map.
Part III: Thebes (Thebes)
The next map, the tenth, is the Alley of Sphinxes. You're probably running low on health after the last battle. Moreover, you have no ammunition - you threw everything away to make it easier to walk through the hot desert. Take care about the ammo for your gun, don’t pick up anything unnecessary - neither health, nor armor - in most cases this ends in attacks from various creatures. BUT halfway down the alley you will come across a flask with health and armor. They are worth picking up, despite the consequences - several biomechanoids. If you do not take health and do not fight with the mechanoids, then THE CANNON and the very necessary missiles will not appear. On the left along the way there will be an oasis with rockets. You will need them in fights with bulls, so take them even if you have to fight biomechaonids. I went through this stage for a very long time - I had little ammunition and health - I had to shoot back from the attacks of monsters with pistols, which is not effective.
After a pleasant walk you will find yourself in a courtyard. If you don't have a cannon, go back and grab the things in the alley. As soon as you take everything, you will be attacked by a lot of all sorts of evil spirits - kamikazes, skeletons, bulls... But it won’t be difficult for you to get rid of them. But since I only had shotgun ammo and a few rockets, I had to replay several times. In the end, I decided that it was time to learn how to rocket jump, and I spent a good half hour learning how to jump. After that, I launched an attack and jumped onto the wall near the entrance. It's a good idea to climb a few feet higher. As soon as I got to the very top of the head, I shot all the monsters for fun. It's a pity that I didn't learn this technique in that terrible room with the toad on the Oasis map...
After you have dealt with all the bulls, you will find yourself in the second yard. Luckily, you'll have a good chance to replenish your health and ammo. When each rune is placed, waves of monsters will appear. I tried to heroically get through this courtyard without resorting to a rocket jump onto the wall, but it seems that I can’t do without it. So, place the first rune in the near left corner, and jump onto the wall separating the first courtyard from the second. Run back along the wall, away from the dangerous place. Shoot monsters - it's not difficult. Place the second rune in the near right corner, jump out of here quickly. Place the third rune in the far right corner and rocket jump again, this time to the back wall. There you will only have to deal with skeletons and kamikazes. I placed the last rune in the far left corner. This time there was no need to resort to a rocket jump. I dealt with all the monsters on earth using a bazooka and a laser. After you kill the last biomechanoids, four reptiles will appear. Shoot them and the balls they launch from the laser. Know that in the middle of the road you will find a lot of ammo and health. I knew that it was time for the most terrible monster, the Lava Golem, to appear. I got ready to run along the trail and collect all my things, and then make a rocket jump out of harm's way. To my amazement, this hefty monster first flew into the first yard, thereby giving me a good opportunity to shoot him. I don't know why he did it. But I know for sure that he did just that, thereby making my life easier. The big monster spawns smaller ones, but you don't have to shoot them to get to the next map. Concerned about this strange behavior of the monster, I completed this map on the SERIOUS difficulty level. This time, the monster stayed put and I had to rocket jump to the right to hide behind the tower. I continued to shoot with the bazooka and the cannon until I killed him. But he left numerous offspring. Moreover, both children and even grandchildren were running near the wall from which I was shooting. I jumped into the first yard and ran in the other direction. Then he jumped back into the main courtyard and ran like crazy towards the exit. These monsters are good at shooting rockets, so you had to run away from them in zigzags so that they don't hit you.
The first part of Thebes is Karnak. This is the eleventh card. The topology of this level is familiar to those who played the demo. In the first room you can also find a secret elevator. Use the levers on the pillars on the right to get the toxic substances. Go to the left side, but don't use the other lever yet. Walk past the columns, prepare a bazooka, scorpions will appear soon. Shoot them quickly with a bazooka, switch to a machine gun or a laser - shoot all sorts of toads with this weapon. Then start the elevator and go higher. At the top you will find health and cannonballs. You can shoot all the evil spirits from a cannon. After you have dealt with everyone, go back down. When a soldier appears in front of the exit, press the buttons in the elevator, do not kill the soldier yet. Go back upstairs and take down the soldier from there. As soon as you kill a soldier, bulls and skeletons will immediately crawl out of the door. Well, are you happy that you went upstairs? As soon as you try to leave the room, a scorpion will appear in the back of the room. The hall and next courtyard won't be anything special, (just note the trap in front of the temple) but the large courtyard on the right will again give you a lot of fun. As you enter this courtyard, everything around seems to be calm. But then the attack of biomechanoids begins. Move back into the first courtyard and shoot them from the doors. Now return to the large courtyard again, press the buttons in the small pavilions on the left and right. As soon as you get close to the temple, a monster will appear. Fire two cannon shells at him. Then deal with his offspring. Enter the temple, use the lever at the back. There will be a few monsters in the temple - nothing special. As soon as you leave the temple, problems will begin again. So follow my instructions carefully. As soon as you leave, a monster will be waiting for you. Get rid of it. In the tower, in the distance, there will be a reptile. It also needs to be removed. Repeat these same steps on the ground. I tried to leave the yard after that, but thereby caused a healthy wave of monsters and could not cope with it. In the end, it turned out that if you run to the pavilion, which was initially on the left, and only then jump to the side, there will be no monsters. And this is very cool. A technique that worked great in the demo, but which for some reason failed in the beta version - just run to the left side of the left sphinx towards the exit. The monsters will try to catch up with you, but will get stuck between the sphinx and the wall.
Return to the first courtyard, now enter the temple, notice the trap is deactivated. Now there are many useful things available in the rooms on the left and right. Use the buttons to open the door and say hello to the scorpion. Definitely, everything in this room is simpler than in the demo. As a matter of fact, the same as in the next one. It's not worth taking risks here for a hundred health units. It is a trap. Open the door to the courtyard, shoot everyone you can, collect things at the door and run along the back wall to the left door. You'll be making a huge mistake if you pick up the shells in the far right corner. And so - this yard is not complicated. Approach the pool on the left, switch to the cannon, get ready for monsters. Shoot the middle and right monsters, run into the water, continue swimming and dodging. Notice things in the water. At the other end of the pool there will be a tunnel leading to the temple. Get ready for familiar fish. Quietly enter the next room. There is no one there, and you can pick up all sorts of things. Use the levers behind each column. Each lever opens a door at the base of the obelisk, the one in the center of the pool. Dive back into the tunnel, return to the obelisk, swim to the secret gravity room, pick up 100 health and armor there. Go back, kill the monsters that appear on the left, swim back into the tunnel, take the armor if you need it. Enter the room with the key, a scorpion with its subjects will attack you. They are not difficult to defeat. Go to the next room. Collect your things in the corners, go to the mirror, prepare your machine gun for a fight with the reptile that will soon attack you. As soon as you swim back, shoot her right out of the water, then spin around and take the pillows that are flying behind you. At the end of the pool, jump out, switch to the machine gun, and run as quickly as possible. Don't stop for God's sake, if you stop you will cause serious attacks from monsters. Go back to the courtyard. Stick to the wall on the left. Jump onto the platform and dive inside the temple. Be prepared to fight with the laggards. As you enter the temple, there will be several monsters, but in general the temple is free from evil spirits, but full of all sorts of useful things. Go to the hall at the back of the temple, open the door to a small courtyard, take a few steps along it, go back. In the pool on the left, a secret door will open leading to the gravity room. You can find a lot of armored shields there, you shouldn't take them, but the room is interesting to look at. Be careful with the two monsters hiding here.
Go back to the small courtyard. Toads are waiting for you here, but since you have learned how to rocket jump, it will not be difficult for you to defeat them. The only place where it is not difficult to jump is the ledge above the entrance. Walk to the middle of the yard until the toads start jumping over the wall. Then run back and jump onto this ledge. It can be used to deal with all these creatures. In fact, this map is much simpler than in the demo. As soon as you deal with all the toads, go to the exit. There are two more waves waiting for you there, so don't jump prematurely. At first you will not be able to get out, then two bulls will attack you. Then activate the door, kill the second bull with it. Take your time to the next courtyard - biomechanoids are waiting for you there.
After you send the biomechanoids to another world, enter the arena of death. This is the most terrible courtyard I have ever seen, and I don’t know how you can get through it unless you follow my instructions. I wanted to go through it the old fashioned way, but I overloaded about 20 times. In the end, I decided to resort to a rocket jump to jump out of there. Pick up things, fight off attacking monsters and kamikazes, run to the wall on the left and if you love life, make a rocket jump. Even after you get away from there, they will continue to throw lava at you, so you shouldn’t run in a straight line - dodge. Shoot the monsters with a bazooka, but from afar. Little monsters and kamikazes crowd together at the base of the wall. If you shoot at a kamikaze, they will explode and take the monsters with them. Skeletons, bulls, harpies, biomechanoids will attack you again... Stay vigilant - the harpies will pursue you all the time. Also, beware of two bulls and a biomechanoid that will appear above you. Stay at the corner of the temple you will soon enter. Monsters will gather below. It's quite fun to throw grenades at the wall so that they fall down onto the monsters and explode there. Four scorpions will appear in the high towers, you may not notice them, so be careful. Without a doubt, this is the creepiest place yet. Once you have dealt with the last monster, enter the temple.
Enter the temple, be careful. The door in front of you is locked, go into the opening to your left - there will be a key there. Don't pick up any pills - it's a trap. The rest of the things can be taken. Open the door, prepare grenades, as soon as monsters appear to your right, use grenades. Quickly switch to the laser - use it to extinguish the next batch of monsters that appear on the left. The well in front of you seems like an ambush, but in fact this place is worth a visit. To get out of there, go to the painted wall, this is the exit. You can also use this room like this: jump into the pit, and when you return from the secret room, the monsters will line up at the door, maybe it will be easier to deal with them. As soon as you leave there, they will show you an interesting movie about how the obelisk sends signals and a spaceship arrives. Go through this room along the left wall, don't worry about the things - there will be a lot of them on your way, and you don't really want to fool around with the biomechanoids, do you? Climb into the room on the other side, collect everything you see here. If you are in doubt, I hasten to convince you that you will need all this in the next yard. In the same room you will find another manuscript, which tells about the second secret map, The Sacred Yards.
Exit into a large courtyard with many towers. You have to collect four golden ankhs and place them at the base of the central tower. As a rule, as soon as you place a sign in the right place, all sorts of evil spirits attack you. The most terrible attack is the first. Biomechanoids, a bunch of bulls, kamikazes, in short, a lot of work... Run quickly to the ledge and jump out from there with a rocket jump. Scorpions with skeletons will attack next, the ledge will not help you this time, I just dived around the corner, picked up health there and took out all this creature from around the corner with cannonballs, grenades, everything that was at hand. Next in line are the reptiles, again, there is nowhere to hide, so run around the corner and shoot them one by one from there. The last attack is biomechanoids. Rocket jump onto the ledge and shoot them to your heart's content. As soon as you leave the courtyard, you will find yourself in the temple. Take your time to go deeper, there will be a door on the left that is easy to miss. This is the entrance to the Sacred Courts.
The guys from Croteam decided to have some fun with this map, so in honor of this I switched to the maximum difficulty level (SERIOUS). The first yard is very difficult. You will be attacked by terrible monsters, and there is no fun here yet. So I just jumped out of there onto the right wall. Go to the next courtyard, in its center there will be a large pool. If you take a pill at the entrance, a funny little reptile will appear. Don't touch her and she won't touch you. Try at all costs to get her to talk. Pack your things and jump into the pool, get out of here. Get your machine gun ready, you will soon meet fish. If there is no machine gun, go deeper into the tunnel, and as soon as you see fish, launch grenades at them until they all die. Beware of stragglers, they may appear behind you. The exit from the next courtyard will be barred. Use the levers on the sphinxes to get out of there. First use the levers closest to you, then turn around and run into the small room to your left to deal with each of the monsters. Then turn the lever in the far left corner, go back, then the lever in the far right corner. As soon as you exit, biomechanoids will appear, but if you hurry, the door will close right behind you. There will be a puzzle in the center of the next courtyard. She may be able to tell you something. Go to the left courtyard, it's actually fun here, all sorts of gravitational things, little monsters. They are affected by the same forces that are on you, so it is quite interesting to see how they attack you somersaulting. The easiest way is to do a rocket jump and get to the sphinx on the platform, but in general, this level is very interesting, so you can just have fun. I don't recommend using rocket jump here. It's better to use all three levers on the sides of the gravity room to make your way to the golden sphinx. Just below the sphinx there is another secret lever that allows you to pick up health and armor on the wall. Take the sphinx, bring it to the puzzle, try to use it, beware of the creatures that greet you at the entrance. Go to the right courtyard, at the entrance pay attention to the lever on the floor. You must return to this lever each time to rotate the central platform over the pool. Under the platform you will find some health. Use the levers on the sides of the pool to fill it with water, swim to the platform at the opposite end of the pool, and take the sphinx hidden in the opening in the wall there. Beware of the scorpions attacking from the back wall, fight them directly from the water, this is quite difficult and distracts you from the main goal. When you get to the sphinx, reptiles will appear, calmly shoot them one after another. As you leave this yard, notice the ammunition to your right. If you take them, you will immediately find yourself in another secret place, where there will be a brutal showdown with flying biomechanoids, scorpions and bulls. Scorpios will not attack you right away - they need time to detect you, so you should move away and deal with everyone from a distance. Shoot the bulls that appear from behind the pyramids with a cannon or something similar. When it's all over, two big-headed fanatics on a funny jalopy will ask you not to enter the pyramid. In any case, get there, turn the lever, and the pyramid will instantly turn into a monument to you. I tried to rocket jump to the top of the pyramid. Perhaps in the beta version there was actually no way out of this place, no matter how hard I tried, I couldn’t get out, I had to use a rocket jump.
The last thirteenth card is The Pyramid. You find yourself in a large room, then go to a small courtyard, where you collect things. Pay attention to the right wall of this courtyard; it will become your shelter for a short time. Go to the next courtyard. You'll have to work here too. Walk to the middle of the courtyard, as soon as the skeletons attack you, run back to the entrance and jump onto the wall using the already familiar technique. I jumped on the one on the left. This is exactly the wall to which I recently drew your attention. You will be safer here. Deal with the skeletons - it's not difficult from your position. Then there will be a wave of bulls. They are able to reach you by climbing on top of each other. So be careful. Then a horde of biomechanoids will appear - you will have to run back to the wall to dodge their missiles, especially when they are in the very depths of the courtyard. As soon as you deal with the biomechanoids, you will have to fight the skeletons again. I have no idea how one can survive here. Jump into the neighboring yard and collect things there.
Go to the big valley, enjoy a movie with a big Bad Actor who doesn't love you. Immediately after the video, be careful, bulls and biomechanoids will attack. Your goal is a large temple built out of rock at the other end of the valley. Shoot everything you see with a cannon. This is an excellent weapon against bulls. Don't worry too much about ammo, you'll find plenty of ammo, shells, health, and armor along the way. Choose it, all this will be useful to you. Go up the path, shoot from the cannon, switch to the laser if necessary. As you approach the temple, notice the large sphinx statues on the ledges on both sides. Make your way to the ledge, beware of skeleton attacks, pick up health and jump behind the statue. Try not to leave too many little monsters alive when you hide. The big ones won't get to you, but skeletons and kamikazes can. Most will gather at the ledge, and they can be easily shot. And some may try to attack you. The statue is the place where you have to duck, fellow Bad Actor destroys everything, no matter what you hide behind. Don't try to shoot him in this place. I don't think you will harm him in any way. Notice that there is a spaceship moving above you. At a certain moment you will hear the sound of a bell. This means that the door is open and you can make your way to the exit. Don't skimp on health and ammo. The only goal is to get out of here.
Now you are ready for the final battle. You are inside a pyramid, there are ledges at the corners that seem to place you in inert energy fields. Why is this being done - ask the developers from Croatia. At the base of each ledge you'll find health, armor, and ammo, which obviously replenishes constantly. The Bad Actor is back, and to finish the game you have to kill him. Run from ledge to ledge, from corner to corner, shoot at the monster with everything you have. I recommend the gun and laser. The gun is very destructive, and with the help of a laser you can shoot various projectiles flying at you. Keep shooting at him all the time. Don't hesitate, keep wandering. As soon as you visit all four fields, a death ray will appear at your disposal, with its help everything will be much simpler. A couple of times it will seem to you that the monster is dead, but then it will come to life again - don’t despair. Just keep shooting and dodging his projectiles. One day he will surely die, then it will be possible to board the ship. Make sure your seat belt is fastened, you will be traveling for a long time.
I apologize for spelling errors in the text (if any)
You can also download the walkthrough as a file.
Level 1 - Hatshesup Temple (secrets found - 4 out of 7)
We appear near the Hatshesup Temple - she was a pretty beauty, by the way.
If you turn back, then in the distance and slightly to the left in the desert you can see a green speck -
there is a small oasis with health, ammo and rockets (1 secret out of 7 on this
level). But when you rush there, an honor guard will come out to meet you
adult Biomechanoids, those who turned red with anger. Having two pistols and
running around them in a circle is easy to overwhelm them - they do not take into account your speed and
their missiles fly by. But for now we only have one pistol, so it would be nice
find the second one. Immediately from the place of appearance, go to the right and jump between the columns -
There's a Secret Pistol hanging there - a regular copy of ours. Plus - two are better than one,
and they also found a secret (2 out of 7). We go back and go down one flight of stairs
down. We turn right and go along the stairs - Aha! Between the columns there is some
door. We kill it (3 out of 7) and a party of idiots with big heads comes out.
We are awarded as many as 50,000 points for this, so it’s useless to kill them - it’s still for
They won't get points. Each of them will come up to us and wave their fingers - like we are yours
fans and we look at you :). Having gone into the depths of their chamber, we take the rockets.
Now we are going to the distant Oasis, having shot all the Biomechanoids with pistols.
When I played for the first time and shot down a rocket flying towards me in flight, I remembered
a film where one also shot down a missile fired from a bazooka with a rifle. Second then
said - “Yes, you are just a Patriot system!!!” Who doesn’t know, then Patriot -
American anti-missile interception system. I called myself that too and when I ran
before Oasis I took everything there.
We return to the temple and rush up the stairs, shooting everything that
moves. As already said: Boss, if the hallucination moves, shoot it,
if she speaks, cut her throat, this ruins most hallucinations! :)
When we find ourselves at the very top of the stairs, turn right and walk along
right wall, including all turns. When we almost go around the entire portal (this is not
teleport, but part of the building), then one of the walls will lower itself when we
let's walk past it (you have to walk almost touching the walls) and in a niche (secret 4 of 7) we
we get a double-barreled shotgun. Unfortunately, I didn’t find any more secrets:(After clearing
all rooms, calmly move on and leave the level. No jokes
not here.
Level 2. Send Canyon (sand canyon) (4 of 6)
I go out alone onto the road... And a headless idiot runs out to meet us with a couple
bags in hands. Without having time to say qua, we fire a volley at it and it is blown apart
shreds. Offended by such treatment, his brothers in headlessness rush at us
the whole herd. Having shot them, we read that they are Screaming Kamikazes. Two for you,
creators of the game! Kamikazes are suicide pilots on airplanes, and people are...
Suicide bombers in the Japanese army were called Taisentai. well and
what they yell is their problem :)
Having convinced all the local living creatures that they are better off when they are dead, we leave
inhospitable desert.
When you go out into the dark corridor, where Kamikazes will run behind the closed gates
(we will call them that, since the creators of the game gave them this title), be
be careful - when the gate opens and you jump out, it will come from the top left
a large pebble that will crush you if you don't jump out of the way.
We pass through all the halls to a room where a bunch of Little Frogs are jumping on us. Certainly,
They are the same little frogs as I am a heffalump, but they jump the same way. Filling everyone in this
room, look to the right of the entrance - under the first of the windows the slab is darker -
we poke and take a Thompson machine gun in the opened niche (this secret helped us find
SanZ - 1 of 6). Taking it, we run out the door. We immediately take to the left and behind the column - us
throws up and in flight we taxi to the right - there is a bulletproof vest on the column (2 of
6).
Looking forward, we see a window in the wall. We jump into it. Immediately to the left - coming
descent Under the descent there is a small cave - health (3 out of 6).
Then we go out again into the desert, where we will get acquainted with the Syrian Bull and the Small
A stilt, blue with fear. Both of them throw back their hooves (and the bull in
literally :) after two shots at point-blank range from a double-barreled shotgun. But I have one
the idea that somewhere in undiscovered secrets lies a rocket launcher, since the next
I found the secret on the roof of the portal that leads us out of this desert. But
I just couldn’t jump there - I didn’t have a rocket launcher for Rocket Jump.
So I let the bull lift me up on his horns and he threw me with a mighty blow
top (4 of 6). True, only on the 3rd attempt - the rest of the times I just flew by
by.
By the way, in this desert, when you take all sorts of little things, they can throw a lot of stuff off from above
big cobblestone, so be careful.
Unfortunately, I didn’t find any more secrets, but at the next level I won back -
there I found ALL the secrets.
Level 3 - Tomb of Ramses (8 of 8 secrets)
Standing with your back to the enemy is the same as sticking your head into a guillotine and
pull the starting rope. You must immediately instill this thought in two headless
idiots standing with their backs to us.
Let's go ahead. Having climbed the stairs and shot Kamikaze, we go out into the big
a room with passages to the left and right and a staircase ahead. Let's go to the right
passage, go up and press against the left wall. We jump over with a running start
through the gap and we find ourselves in the Secret Passage (1 of 8). After that
we jump down and exit from the left passage. Now let's go to the stairs that were
directly.
Having walked along long passages to the next staircase, we climb it and
We run into a cabinet where the fire is burning. We jump onto it, and from it onto the narrow one
the path that runs along the wall (on the right). If you stand facing the wall, then first
go to the right - there will be a red heart on one of the beams - +100 health (2 of
8), and then turn left and go out through the secret passage (3 of 8) into the corridor where we
They would have gotten in if they hadn’t jumped on the pedestal and moved on. In short - it doesn't matter
would get here, although if you went around, you could go into the room where from
the health pill will run you through. Grabbing it will cause you to be attacked by Skeletons
Klee. The joke is that by jumping onto the lamp stand and sitting down, we will become for them
inaccessible, so I shot them with a pistol.
Soaked Young Scorpio(Juvinile Scorpion) in the long corridor further, exit
from this trap. Immediately the staircase splits in two, we go along the left and see more on the left
stairs. Having climbed it, we see a rocket launcher, but we can’t just take it.
We stand opposite the rocket launcher and look to the right - there are lights flashing in the niche -
this is a teleport that will take us to the rocket launcher (4 of 8). And the rocket launcher itself
is a separate secret (5 out of 8).
After a long walk, we come to a hatch door. Standing with our back to it, we see a beam,
going over all the corridors below. Having walked along it to the first transverse beam,
turn right and go to the wall - in a niche there is a Heart (6 of 8). Further
walks follow the principle - everything that moves must die.
Finally reaching a place where there are two white statues near the door. We dress the tsak and
we rejoice (copyright kin-dza-dzy). We stand with our backs to the statues and walk forward until
Let's not rest our foreheads against the wall. We look to the left - a secret passage is visible in the darkness (7 of
8). Having passed along it and collected cartridges, we leave the room with cartridges to the left and along
walls on the left we go to the place where the Small Scorpio stood, and now there is a red
armor - +200 armor (8 out of 8). So we have collected all the secrets!
Well, now, armed to the teeth, we dive into the passage between the white statues. This
leads us to a room with columns. The doors are closing and a crowd of creatures is trying
convince us that we don't belong here at all. We prove to them the opposite. Be
pay attention! Once the last creature was killed not by me, but by one of the Little Frogs,
which itself exploded. And at the far end of this room (where Big
Scorpio - Adult) the slab did not go down. I had to rocket jump. A
if you play at a weak level, then that’s it - you won’t get anywhere and the game will hang -
You can’t jump, and there’s nowhere to go. So kill everyone yourself and don’t let them kill you
each other.
You can, of course, immediately rocket jump to the exit, but it is closed, and
It's a bit difficult to dodge the Klee Skeletons there. But all sorts of small things don’t interfere - they
They run around below and can’t jump here. So go ahead, each in his own way.
After clearing, we exit - the end of the level.
Level 4 - Valley of Kings (secrets found - 2 out of 4)
This level is quite simple, but it has the main joke - exit to one
from secret levels.
Walking along the large Alley of Kings, in which all the trees had long since dried up, we
At the end we will get acquainted with two types of four-armed bastards, one of which is still
completely green (literally), the other is already ripe, as it is red. Both of them
armed with homing missiles of the same color as the creature. Green
can withstand 3 missiles, and the red one represents a superbeast, so it requires 15 pieces.
Running back and forth and left and right, I calmly dodged projectiles and killed
creatures. The main difficulty was not to hit an enemy shell with a missile when it
flew past me - the shock wave would have shaved off my body armor like a piece of paper!
Coming out into a large hall with a rune in the center and a pool, we run into the side branches and
Let's press the buttons there, the rune will go down and we'll take it. You can dive into the water and
get acquainted there with huge electric piranhas - and teeth to hell, and electric current,
like from a spark gap from Kwaki. But we don’t have to dive there.
After a long walk through the passages, we find a room with a mirror-smooth floor,
in which Papyrus lies. By the way, it says about a secret level. After
We go out to the descent, at the end of which the Lesser Scorpio will come out to meet us. Having failed
him and making sure that the door on the left is locked, we go to the right, shooting doublets at
To the skeletons of Klee. And straight into a dark wall, which, it turns out, is not a wall at all.
After pressing the button, the panels on the wall rise, and a small
Klee crowd. Having filled them up, we go through the door that was closed.
Yeah! The red heart is hanging! Having opened our toothy mouth with greed, we
we rush towards him... and find ourselves trapped! A whole crowd rushes towards us
little blue ones that haven’t eaten for a long time (no head!), and therefore calmly pass
through the bars. Having shot them, we wait for the Kli, who are in a crowd (herd, you understand,
the creatures - not one at a time :) are piling on us.
Then the grate rises and the door opens, the key to which was the Heart.
Scorpio crawls out from there, and on more difficult levels another one comes after
for Klee. You can knock them down, or you can dive into the door and press the button on the right -
the door will close and the creatures will remain there :).
Now we go left as we move - press the button near the statue and on the right above the water
the spikes go to the ceiling. We jump into this water and take the rune. Let's go further.
Walking through the level itself does not present any difficulties until we reach
rooms where a Thompson submachine gun hangs - one of my favorite types of weapons,
without which it would be difficult to get through the very last creature.
A teleport opens in this room and from there, like from a cornucopia, they begin
fly out Frogs. The machine gun here is also not bad - I killed with single shots
frogs before they could even jump off the central pedestal.
Here we find the first secret - after shooting all the creatures, we leave
rooms. Carefully! As soon as the door opens, Skeleton Klee will jump on us, so
that I advise you to quickly jump to the side - after the jump the Klees stop for a couple
seconds and this is the time when you can run up and shoot at them with a double-barreled shotgun -
tears to shreds. In general, a double-barreled shotgun is the coolest weapon against Klee, although
Tractor drivers (keyboard players) and Teapots will find this a little difficult.
Actually, there's an interesting glitch here. If you die anywhere starting from this room,
We get to the next level, but to the normal one, not the secret one. But that's not always the case
works.
Running along the path, we will see a teleport on the right (from where the frogs jumped) and approach
edge. We look to the right - in the corner there is a plate that will throw us high
up, where there is a secret bulletproof vest (1 of 4).
Then we jump down and move on. After a short film where we
We take the rune, we go to the edge of the cliff. If we jump or fall down, we will move to
next level, but we want to go to THAT side, but the bridge will collapse, so
I don’t recommend going along it.
We go to the right along the cliff and look up - there is a swing jammed in the rock. Let's shoot
in them even with a pistol (the difference from the beta version is obvious) and they start
swing over the abyss. Here's the joke - you have to jump on them and fly over
to the other side. If you didn’t have time and the swing stopped, then shoot at it -
they will start rocking again.
Having jumped from the swing to the other side, we go into the passage - we found a secret exit
level (2 of 4 secrets). Alas, I didn’t find any more secrets.
Level 5 - Moon Mountains (Moon Mountains - secret) - 5 out of 7 secrets found.
This level starts with a party on the islands. If you don't know how to spin
louse in a frying pan - that is, it’s hot and there’s not enough space, then it’s better for you not to reach this level
come in. After each passage along the bridges, the bridge collapses behind you and there is no way back.
return.
On the fourth island, if you go to the edge where it is closest to the wall, you can
see machine gun cartridges, and a red bulletproof vest hanging in the abyss nearby.
We approach the edge, the body armor flies up and falls on the center of our island (1 of
7).
Here's another joke. When I ran against time (that is, I simply broke through without complete
clearing creatures), I jumped off the fifth island using a rocket jump
through the waterfall to where we will then get through all the islands. Appeared
the inscription "secret passage found!" (2 out of 7). But it’s not easy to jump and fly, and
Why it is needed is not clear.
Having broken through to this balcony, we approach the very water of the waterfall and walk along the water
past the rocks - there Secret health(3 out of 7). Then we go to the big waterfall,
We jump down and calm Scorpio down near the exit. But DON'T jump into the hole.
exit, but we go along the wall. The back wall lowers and we enter with a secret
cave (4 out of 7). There we are met by a delegation of Screaming Kamikazes. Having smacked them,
We jump down, having previously picked up the machine gun - there are a lot of fish under water.
Having made a colossal fish out of the lake, we swim again under the well, through which
got here. If you look through the exit door, then swim to the left around the corner of the rock, then
there will be a Heart on the rock above the water - secret 5 of 7.
We get out of the water and through a long passage we move to the river, which takes us out
to the next level.
Level 6 - Oazis (3 of 6 secrets)
WITH screaming A-a-a-a-a-a-a!!! we fall into a huge puddle. Having hit the bottom, we
we fly out of the puddle and find ourselves in a large area. After a long and bloody
battle, in which I found a good joke (driving the creatures into the puddle where we
fell - it’s deep and the creatures can’t get out of there), so, after this
battle, we go out the gate and take the Grenade Launcher - a very good thing when needed
retreat before an advancing enemy.
After a pleasant conversation with Klee (don’t get your hopes up, there will still be a herd), and on Normal
level - also with the Red Biomechanoid, take two health tablets on the left and
to the right of the statue in front of the entrance (first part of the secret). Let's go into the passage to the left of
entrance - there we take 1 unit of armor and activate the second part of the secret. After
We destroy this statue with a rocket launcher. A green circle opens under it (third part
secret), which will throw us into a niche above the entrance (3 out of 6 at once). Yeah!!! Here she is,
cool thing - Minigun - a six-barreled rapid-firing machine gun, which, although
doesn’t immediately start shooting, but makes a sieve out of everyone. Naturally, he eats those
the same cartridges as the Thompson submachine gun, so much so that there’s not a damn thing left in a couple
minutes.
Then, with a roar, we fly into the right passage and pin down the one standing below with rockets
Scorpio. Two is enough for him above the roof. Having run into a long corridor, we take health,
but don’t rush to run out the opened door - when you take one, a
another, then a third, so we go out into the room only when, after taking
anything and killing all the creatures nothing appears.
Well, now a great joke awaits us - there is a bag of cartridges in the room,
body armor and superbeast. But she doesn't lie down. They just start coming to us instead
jump out tueva hucha Little frogs. The best tactic is to run from them, rushing to the left -
to the right so that they don't hit us during the jump. When they gather behind your back
a small crowd, you need to turn around and throw a grenade at them - a bunch of Frogs
they go to the next world at once. Or hit them with a machine gun. But that's something else
entertainment. And only for those who play at a level below Normal.
Croteam also provided this joke - the weight of the body armor reduces the height
RocketJumpa. There, at the Normal level and above, I do this - I don’t take a bulletproof vest
(usually by this time I don’t have it), immediately upon entering this room I take a left
and shoot myself in the foot closer to the wall. Without a bulletproof vest, I'm thrown into the gallery
at the top, from there I calmly, going to the very edge, shoot all the Frogs from
pistols.
After the death of all the Frogs, we leave the level, breaking through the corridor of surprises -
the creatures appear one after another, and a couple of dozen Frogs for a snack. But we don't
the French, so we'll just shoot them. Alas, only 3 secrets.
Level 7 - Dune (Dunes - 5 of 6).
I liked this level. It has just begun when it appears before us
a small herd of Biomechanoids, blue with fear. Having treated everyone to a rocket, I
rushed to the exit from this narrow place where we appeared. Flying past the red
biomechanoid, who tried to block my exit and treated the bulls with missiles, I
ran out to the city. Why, you ask. You can kill them all without running out of there.
Horseradish!!!
After these bulls, Klee and Biomechanoids, a crowd of headless screaming people rushes at us
Kamikaze. So they would have pinched us there. And I, being almost at the city walls
shot them all with a pistol. BUT I DIDN'T TAKE THE AMMUNITION AND ARMOR VEST that appeared
after the death of the last creature before Kamikaze. When we take them, come to our meeting
a whole crowd of bulls and Klee will fall out and there will be no time for Kamikaze.
Having shot all the Kamikazes, I decided to steal the secrets. We go to the exit from the place where
we showed up. We stand facing the city. Now we go to the left - health hangs there and
when we take it, cartridges will fall from above (1 of 6).
Now we go to the same point, but on the right - exactly the same (2 of 6). Every time after
this is where the Kli appear. If you look further to the right, you can see a palm tree -
small oasis and Heart (3 of 6 secrets). A whole herd of flying birds immediately arrives
Bab. I ran in a circle until they were all in a tight pile, and then I shot
at them with a rocket or fired a grenade, holding the shot. The explosion tore a third of them to
line, and another third fell to the ground and started running after me. I shot these with
pistols - cartridges were a pity.
By the way, please note that sand when running to the left or right of the city
becomes darker (the oasis is beyond the border of this darkening). Long
being beyond this boundary is equal to being under water for a long time, but not
oxygen consumption is visible. So be careful - when running from creatures I often
at first ran beyond this border, without noticing it and not understanding why suddenly Sam
begins to hiccup and his health declines.
At first I didn’t find one secret, but then I figured it out. If you stand facing the entrance to
city, then a lone tree will be visible on the left. Even with a shot from a rifle we
we smash it to pieces - health and ammo appear nearby (4 out of 6).
Well, now we are ready to run to the city. The following 2 secrets are possible ONLY for
those who play at the Normal level and above. Mine is also intended for them.
tactics to almost safely pass this place. For those playing at a weak level
you'll just have to run around, shooting at everything that moves.
Well, for Norma, we run into the city and grab the Laser. How in star wars. We're rushing
to the far corner on the left and Rocket Jump onto the ledge. In the corner there is a passage to
secret place (5 out of 6). Standing there and holding a laser in our hands, we shoot back at
everything that appears, first of all, from the darkness-darkness of the Kli, some of
who jump on us. Without getting down from there, I also shot the Biomechanoids,
hiding in the passage. Then I used a laser and a machine gun to kill the emerging four-armed
monsters. The machine gun and laser allowed me to shoot down their missiles long before
they reached me.
When everything died down and Sam howled joyfully Yo-ho!!! I got down and headed towards
opposite corner. Using Rocket Jump, I jumped onto that ledge. But
Jump off from there IMMEDIATELY after the jump - soon this elevation will collapse and you
will crush. And a couple of red Biomechanoids will finish off what won’t be crushed
stones. And after jumping, we kill the biomechs and then take the Heart (6 out of 6), which
appeared on the site of a collapsed building. Let's go out.
Level 8 - City (secrets found - 7 out of 7)
We're in the city. There are no people there, but the creatures are through the roof. In the first city it's in
mainly Klee and Scorpio machine gunners, in the second city it’s easier - there’s only darkness there
(more than 60 per Normal level) Biomechanoids scared blue in the face. Where,
You ask, is this a number? So for each of these creatures, so as not to take too long to figure it out, I
I landed 1 missile, and there are 50 of them in the ammunition load (on Normal), and I also had a couple of packages
took it on level.
All secrets are located in niches near the walls, except for the last one. But there are a couple of secrets
jokes. In the second city, to the left of the exit gate there is a regular health bottle, but
secret :), but to the right of the exit gate there is a piece of armor hanging in a niche. When we
We take it, a musical howl is heard and an activation message appears
musical trap. We'll get out of there immediately, and count on the fact that
a house near this place will approach and you will have to run around it. Both types appear
biomechanoids and green four-armed.
Well, right there, to the right of the exit, but only in the very corner of the city, there is armor and when
we take her from behind, the wall closes and on three walls around it appears blue
biomech. And then - Red at the top and in front. So advice: Take a machine gun in your hands
or laser. We take the armor. We shoot the blue biomechs, and then seal ourselves to
the wall that blocked our exit - Red doesn’t see us there. The wall will soon move away, we
We run out and calmly maneuver and spank Red. If you don't stick to
wall, then before she drives away, Red will treat us with rockets, which are in a closed
space traps are very painful, even if you shoot them down in flight - too
close.
Well, when you press both buttons in the second city to open the well,
It's time to take the last secret. We stand with our backs to the exit gate and jump
into the well without releasing the "forward" button and we fly into a secret - a niche in the well.
Having taken armor and health there, we jump further - we are at the next level.
Level 9 - Sewers (sewer - 4 out of 5)
Having fallen into the water, we emerge. Well, it stinks. Clearly no one has cleaned this place for a long time. Straightaway
we jump into the water again and dive down, pushing into the wall closest to us (from which we
jumped off). Continuing to dive, we reach the place where the wall ends and swim
under it. Most quick way to dive is to swim forward, looking down, yes
and also press “sit down” (and to float up - forward with your face up and also press
"jump" button).
If you did everything correctly, a message will soon appear indicating that you have sailed into
secret corridor (1 of 5). There we take the Red Heart and wet a couple of fish.
If we swim forward, we will emerge to where we will end up anyway, but all creatures
will be AROUND us, so I advise you to return and dive to where we fell.
Now we move forward, clearing everything and everyone. Walking over the water and up the stairs
we will see a beam on the left above the water and a bulletproof vest on it. Jumping on it (closest to
there is a ledge on the stairs - even without Rocket Jump) we take the body armor (2 of 5 secrets).
Now let's look under the water. One of the columns glows underwater at a certain
angle of view. On it, deep underwater, there is a button that opens the exit door.
Having activated it, we leave. After a lively shootout with the Frogs, we
we go down the stairs. When entering the water, stay to the right and
We fall into a secret tunnel. After swimming in it, we take cartridges there and wet the fish
(3 out of 5). The elevator will take us back to the upper water and we will go through the well again
Let's go back to the Sewer.
After going through a terrible massacre, we come to the entrance to the underwater part of the Sewer, but
A slab descends from above and a green four-armed man appears. Shooting him with
machine gun, we run towards it, since a bulletproof vest is visible behind it. We jump into the water (creature
will already throw back its hooves), and we jump there (4 out of 5). If you didn’t have time - kerdyk, this one
the secret can no longer be taken.
By pressing the button, we lower the stove again and kill Hans the machine gunner, nicknamed Scorpio.
We press the button again and jump out of the niche - the stove quickly rises and we clearly cannot
I want to be smeared on the ceiling.
After swimming underwater, we find a way out and that’s it. Tip - I swam with a laser, clinging to
floor - and the laser tears the fish to shreds, and the light from it is reflected from the floor and walls,
lighting up the road a little. In general, the lack of a flashlight is bad.
One secret I never found. We go to Metropolis.
Level 10 - Metropolis (Secrets found - 0 of 1)
This level is preparation for the very last hellish battle.
Having escaped from the sewer, we find ourselves in the city. We just wet everything we can
you can, and get ready for the fact that no matter what you take, creatures and their
will have to be shot. So be careful - don't grab everything at once.
If you can’t fight at all and you play at a level higher than or equal to Normal, then
We run up to the wall and jump onto it with Rocket Jump. Admiring the pile
glitches (such as mirror surfaces that turn out to be simply lost
structures). We run forward, past all the glitches and past all levels up to
the last one.
They are all surrounded by walls, so in one place we are forced to jump onto the sand.
Well, near the last part of this level there is such a crap thing on the sand - a spring,
which will throw us back.
Here the jokes of the last square await us - first, a bunch of Bomberman (I
killed with pistols when the gate is open or with a Thompson machine gun - when
the gate is closed - see below when the gate is like), then the birds, then the bulls, then
a bunch of Klees and a few Red Biomechanoids. But there's one funny thing - the gate to this
the area works according to a strange principle. When we take things to the square and
the first creatures appear, the gate should close (if we were walking normally
way they would open, letting us through). BUT!!! Since we jumped from behind the wall,
then the gate was originally CLOSED and now it WILL OPEN. Having run out in them we get up
and the creatures are forced to attack us through the narrow gap of the gate (except for the flyers). It's much
makes our life easier. BUT! Don't run around the corner like that - the gate will think that you
came the normal way and will close, blocking your exit and you will already be back
you can't :)
Well, now some tips for those who play for POINTS and want to go through
the normal way. Having passed through the black arcs in the first hall, we will open the gate further
and we’ll give ourselves terrible hemorrhoids - there’s a city outside the gates in which we need to
exit to find 4 beetles in the houses. It is not difficult. The difficult thing is that there are creatures in THIS city
appear when passing through the streets and there are an awful lot of them there, especially machine gunners -
scorpions and headless ones of all varieties.
Well, when you go out to the next part of the level - the road between the houses, then the first
the middle of the level is simple - up to the pit with nails. After that it rushes towards us
a giant herd of bulls, and then an even larger Klee herd. If you hit them from
weapons, then it's too fat - there won't be enough bullets, so I did it this way.
The first bull always calmly falls into the hole and dies there. The second one is also rushing, but
the stove slides out and he finds himself on our side. Gotta jump to the side
right in front of his nose, but so as to end up on the slab and make it to the other side
before the plate moves back. If you stand on the other side, then
every time the bulls will fly over the retractable plate to us and we will have to
wet.
Well, having jumped OVER THE PLATE (you can’t rocket jump - the slab will
continue working) to the other side, we run out to the corner and see another bull,
or even a couple. We rush back and fly back with Rocket Jump. We run back almost to
turn. The bulls fall into the pit. BUT!!! Run from side to side as you fell
into the pit the bull dies immediately, but the second one that fell on him does not immediately disappear
jumps out of the hole to our side. Well, if we rush left and right, the bulls fall
in various revenges and die. You can go through all the bulls without losing a single cartridge.
When the bulls run out, we run up (usually the stove closes) and we calmly
we run to the other side. The stove hides again. Let's run further and grab it there
cartridges and health and... a whole herd of Klee is rushing towards us. These skeletons run a little
faster than us, so we rush back to the pit, firing back from the Klees who are overtaking us.
Having reached the pit, we again fly over to the other side with Rocket Jump. Again we rush to the left-
to the right - both so that the Kli fall into different places in the pit, and so that
dodge their chains with weights - Bolo (that's what they are called).
When the Klee fall into the pit, bones fly up like a fountain - I really like it.
This will have to be repeated 3 times - the creatures come in 3 waves. Well then as above
described - the last square, a bunch of creatures... BUT!!! the gates are closed and run
will have to be inside the square. Having killed everyone, we leave the level.
I still haven't found the secret...
Well, for those who want, you can download this archive (182.945 bytes) - this is
ZIP, inside it is a self-extracting ACE archive, run it and it will open in
3 files. Copy all three to the Demos folder in the Serious Sam game folder and run
viewing Demo Metropolis. I won’t say that this is the ideal way to pass, and
I went through this moment just for the record, but the main jokes of the place with the pit with
I showed with nails.